BACK to 8_inch-a.htm

BACK to 8_inch-b.htm

BACK to alt_11.htm

BACK to alt_12.htm

Figuring the 8 inch F 7.8 telescope mirror continued.
( More of the same )

8_in639.jpg (27824 bytes)

8_in629.jpg (70767 bytes)

Dsc00018aaa.jpg (53830 bytes)

8_in626.jpg (35084 bytes)

Now that I have some idea of the parabolizing stroke I decide to work more on the turned edge.

45 minutes mini weegee lap at the edge.
There seemed to be a scratch along the direction of the lap 
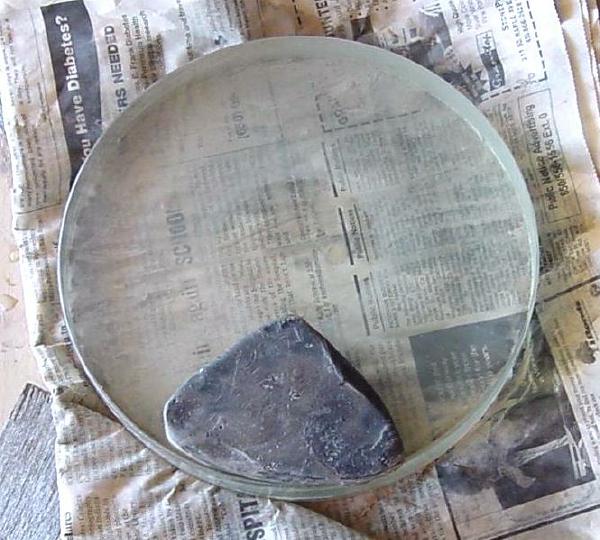
motion. It turned out to be CeO and pitch. I removed it with paint thinner.

30 minutes weegee lap 1/4 inch inside the edge.

Light press

15 minutes lap on top as before.

30 minutes mirror on top smoothing as before.

8_in701-to-be-small.gif (47949 bytes) Inside. If you look at the arrow on the further inside frame you see that the outermost edge still turns down. The focal length at the very edge seem to be almost the same as the mirror center area.
8_in702-to-be-small.gif (39651 bytes) Outside. The area 1/2 to 3/4 inch inside the edge is quite disturbed. This will require more smoothing.  On the further outside frame the contrast at the very edge is almost zero.
Dsc00007z-aaa-resize.jpg (60334 bytes)

8_in643.jpg (44870 bytes)

30 minutes on the lazy Susan guiding the weegee lap around the edge with my finger.

Light Press

15 minutes lap on top as before.

45 minutes smoothing stroke with the mirror on top and the sweat band.

8_in703s-to-be-small.gif (70488 bytes) Inside. Very oblate. Just the reverse of parabolic. The curves are fairly smooth except for some asymmetrical waviness.  The waviness shifted after a while and I decided it was heat caused by leaving the telescope in the sun while I polished.
8_in704s-to-be-small.gif (50013 bytes) Outside.  Something is there at the edge but it seems the turned edge is gone. The parabolizing stroke should smooth the edge.  Time to parabolize.
Dsc00004aaa.jpg (23126 bytes) Warming both mirror and pitch lap after a cool night.
Dsc00009aaa.jpg (20967 bytes) The lap has become very smooth and hard and is grabbing a bit. Here I use the plastic window screen to texture the lap again. The mirror is wrapped in aluminum foil in case there is something on the screen that might deposit on the mirror.
8_in653.jpg (49333 bytes) Light press.
Dsc00030aaa.jpg (27206 bytes) 60 minutes parabolizing stroke with 5 inch circle in the mirror center.  About 20 degrees mirror rotation during the end of each push stroke.  Across and back twice at each of the six lazy Susan positions.
8_in708.gif (46473 bytes) Inside. The mirror is almost spherical. Actually still slightly oblate.
8_in709.gif (55409 bytes) Outside.  The camera causes the mirror edge to be less exposed making the bars appear to narrow more than they actually narrow outside of the mirror focus.
8_in710sa2-.gif (28794 bytes) Inside.
The edge is slightly turned up except for maybe the last 3/32 inch which seems to be flat. Its tempting to try thumbing on the high ring of the turned up edge but I don't think I could thumb precisely enough.
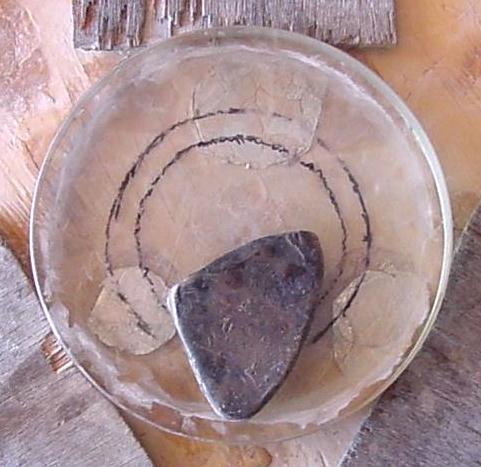
After processing the image in PhotoDraw I can see some faint zones further in. I suspect ( without having a way to measure ) that these zones are less than 1/10 wave. They were probably made by the weegee laps.
8_in711sb2-.gif (29389 bytes) At the radius of curvature of the center. 
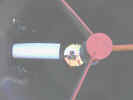
Often there is a bright ring around the mirror edge called the diffraction ring.  If the knife edge is on the left as in these pictures and the diffraction only shows on the right it indicates that the edge is turned down.
8_in653.jpg (49333 bytes) Light Press
dsc00023-to-be-small.gif (270605 bytes) 45 minutes parabolizing stroke with 4 inch circle in the mirror center. 
8_in712.gif (47079 bytes) Inside. Using the parabolizing stroke with the 4 inch circle deepened the center too much.
8_in713.gif (66546 bytes) Outside.
8_in714.gif (30146 bytes) Near center ROC.
8_in715.gif (30095 bytes) Outside of center ROC.  The outer 3/8 inch is slightly turned up.
8_in716.jpg (55113 bytes) 5 minutes, pressing on the weegee lap while rotating the lazy Susan under the stationary weegee lap.  Light pressure.
8_in652.jpg (119448 bytes) Time to touch up the pitch lap with the carpenters saw again.  If I hadn't heated the pitch lap under the hot water faucet first there would have been big flakes missing from the facets now.
Dsc00018aaa.jpg (53830 bytes) Light Press.

10 minutes lap on top 'W'.  3/4 inch overlap on the sides. 1 1/2 inch on the push pull.

8_in717.gif (50889 bytes) Inside.  The high 50 percent zone has softened slightly and the turn up at the edge is less.
8_in718.gif (31577 bytes) Outside.
Near the ROC of the 70 percent zone.
8_in716.jpg (55113 bytes) 10 minutes, pressing on the weegee lap while rotating the lazy Susan under the stationary weegee lap.  Light pressure.
Dsc00018aaa.jpg (53830 bytes) Light Press.

15 minutes lap on top 'W'.  1 inch overlap on the sides.  2 inch on the push and pull.

8_in720.gif (72398 bytes) 8_in657.gif (4937 bytes)The center is still a bit deep and the edge slightly high. The center will be in the shadow of the diagonal.


8_in721.gif (48127 bytes) Outside.  We will not need to use the outside picture further except for a quick check for turned edge.
8_in722.gif (28134 bytes) Looks much smoother than last time.  ( Testing at the ROC. )
8_in723s.gif (30141 bytes) Time for a reality check. Presumably the Ronchi program is giving me good information.  But just to make sure I check using the laser off the reflector.  Using the formula for the minimum distance to the artificial star I calculate a minimum distance of 31.5 feet.  The reflector is about 200 feet away so that is definitely far enough.  The mirror looks good with straight Ronchi bars.  Inside of focus when I push the scope slightly I can see the bar move more quickly across the mirror center than at the 70 percent zone.  This means the center focus is closer to the grating. ( The center is slightly low. )
8_in801.gif (6626 bytes) The Ronchi test is not good at finding astigmatism.  Using the telescope on the artificial star with a high powered eyepiece I check for astigmatism and ripple.  You must be careful to rotate the mirror every few strokes at this stage.  Problems can be caused by forgetting to rotate the mirror when polishing lap on top.

Probably best not to use the weegee lap anymore because it may leave ripples in the completed mirror.

8_in724.gif (228706 bytes) I trimmed the lap with the saw again and then widened the grooves with the utility knife so they won't fill in so quickly.  The lap face seems hard and I'm worried about dust contamination so I scrape the lap face with the utility knife blade.

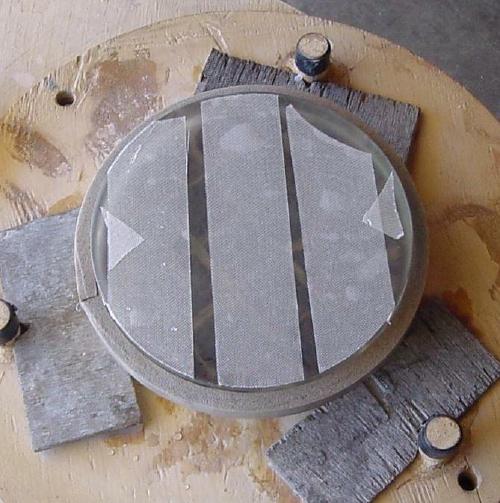
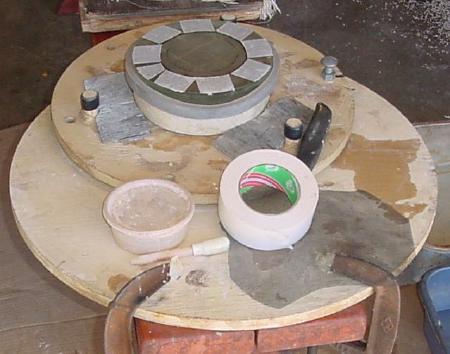
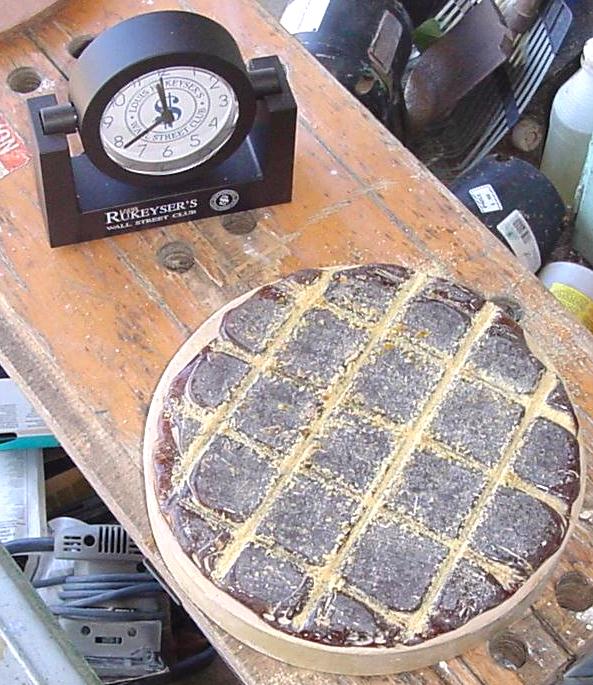
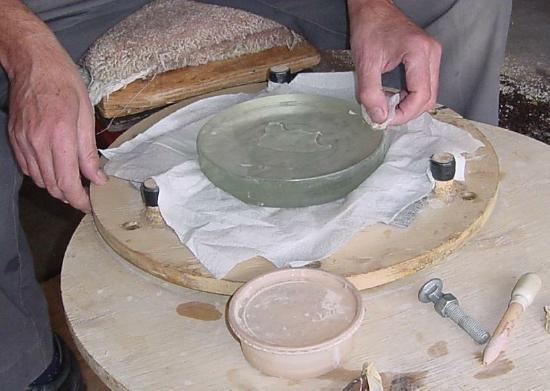
I don't want any 'dog biscuit' from grabbing so I textured the lap with the plastic screen again.

Dsc00018aaa.jpg (53830 bytes) Its the end of October and the mirror is ten degrees F warmer than the air so no need for the sweat band.  Warmed the cold CeO water mix for 30 seconds in the microwave.

10 minutes smoothing stroke. 1 inch overlap on the sides.  2 inch overlap on the push and pull.  Mirror on top. Light pressure.

10 minutes lap on top 'W'.  1 inch overlap on the sides.  2 inch on the push and pull.  Light pressure and not too fast.  Actually I'm lifting the lap slightly.

8_in725.gif (34004 bytes) The center looks slightly better and the edge looks more smooth but the outermost edge is really spherical and not sloped down as with a paraboloid.
Dsc00018aaa.jpg (53830 bytes) 15 minutes oblating stroke to bring the center up.  This also brings the edge up but I will get to that.  The parabolizing stroke with 4 inch circle that made the deep close to the center would have probably been fine on an F6 or F4 but an F8 is more subtle.

10 minutes lap on top 'W'.  1 inch overlap on the sides.  2 inch on the push and pull.  Light pressure and not too fast.  Actually I'm lifting the lap slightly.

8_in726.gif (53675 bytes) Its looking better now. Seems to me the edge is still a little high.
Dsc00018aaa.jpg (53830 bytes) 10 minutes lap on top 'W'.  1 1/2 inch overlap on the sides.  2 1/2 inch on the push and pull.  Light pressure and not too fast.  Actually I'm lifting the lap slightly. ( Sure don't want to turn that edge again. )

The mirror polish is really bright.

8_in727.gif (61449 bytes) Seems about the same.  This picture is a bit closer to the center ROC than the last picture.
Dsc00018aaa.jpg (53830 bytes) 10 minutes lap on top 'W'.  1 1/2 inch overlap on the sides.  2 1/2 inch on the push and pull.  Light pressure and not too fast.  Actually I'm lifting the lap slightly.
8_in728.gif (23740 bytes) Looks just like the print out of the Ronchi program to me.
8_in729.gif (26160 bytes) Testing at the ROC
Dsc00018aaa.jpg (53830 bytes) Light pressure and not too fast.
5 minutes parabolizing stroke with 5 inch circle in the mirror center.  About 20 degrees mirror rotation at the end of each push stroke.  Across and back once at each of the six lazy Susan positions.

5 minutes lap on top 'W'.  1 1/2 inch overlap on the sides.  2 1/2 inch on the push and pull.  Light pressure and not too fast.  Actually I'm lifting the lap slightly.

8_in731.gif (23773 bytes) It looks like the simulation picture to me.  Better slightly under corrected than over corrected and all the lap on top polishing might turn the edge again.
8_in732sm01Dsc00001-sharp.gif (51521 bytes)

8_in733sm01Dsc00010-sharp.gif (37977 bytes)

I decide to do a final check on the artificial star.  Its a cool windless overcast evening after a cool day and the testing conditions are better than usual.  The only defect I can detect in the straight Ronchi lines is a turned down edge at the outer 1/8 inch of the mirror.  I will mark off the outer 1/8 inch with a marking pen.
The most sensitive test I have is the knife edge on the artificial star.  The picture to the left is a simulation of what I saw.  There was still a minor turn up inside the turned down. To this picture add the silhouette of the spider.  And turbulence with about five times the contrast of the turn up shadow on the mirror.  The shadow modulated the turbulence slightly as the turbulence swept past.
8_in821.gif (6274 bytes) Defocus test
8_in735.jpg (34510 bytes) Late to be thumbing.  15 revolutions of the lazy Susan sliding a bit of CeO paper towel 1/4 inch inside the edge.
Dsc00018aaa.jpg (53830 bytes) 10 minutes lap on top 'W'.  1 1/2 inch overlap on the sides.  2 1/2 inch on the push and pull.  Light pressure and not too fast.  Actually I'm lifting the lap slightly.
8_in736.gif (36975 bytes) Inside at ROC.
Rained last night and tonight its clear and cool.  The tube is wet from dew after only 15 minutes of cooling outside.

The knife edge test on the artificial star shows some improvement.  The contrast of the turned up zone is now about 1/10 the contrast of the turbulence.  The eyepiece test shows a very sharp focus.

8_in738.gif (148131 bytes) During normal operation the air will be able to circulate behind the mirror.  It seems the edge is turned up more when the back of the mirror is warm.  So I poke holes in the masking tape to cool the mirror more quickly.
8_in735.jpg (34510 bytes) Late to be thumbing.  10 revolutions of the lazy Susan sliding a bit of CeO paper towel 1/4 inch inside the edge for 6 rev and 1/8 inch inside for 4.
Dsc00018aaa.jpg (53830 bytes) 10 minutes lap on top 'W'.  1 1/2 inch overlap on the sides.  2 1/2 inch on the push and pull.  Light pressure and not too fast.  Actually I'm lifting the lap slightly.
Dsc00030aaa.jpg (27206 bytes) 5 minutes parabolizing stroke with 5 inch circle in the mirror center.  About 15 degrees mirror rotation during the end of each push stroke.  Across and back once at each of the six lazy Susan positions.
8_in739.gif (21167 bytes) Inside near ROC.  It looks like the simulation picture to me.  The grating was slightly closer to the mirror than in the simulation.

Better slightly under corrected than over corrected.

8_in740.gif (31227 bytes) Outside near ROC
laser-A-red.gif (368895 bytes) Another knife edge test.  When the turbulence is better I can see the edge has no shadows.  The light thumbing didn't seem to leave any grooves.  I tried to look for the deep center but if there remained a problem there it was lost in the turbulence coming off the diagonal.
8_in841.gif (13499 bytes) A frame of the de-focus test is shown at left.

I also did a sequence of in focus images to evaluate the seeing.  It seems that unless I could find a location with less turbulence further polishing won't be possible.  I suspect the mirror is an ellipse with a focal point at about 150 feet.  If so it is probably within 1/8 wave of a perfect paraboloid.

If figuring could be continued I suspect that polishing sessions would only be a few strokes at a time.  I suspect the small differential contraction of the Pyrex as it cools would become a major factor.


Coating the mirror, Preparing the telescope and installing the mirror.

10169906.jpg (165919 bytes) Coating the mirror.

To 'Aluminum Coating'.

Dsc00046aaa-sharp01.gif (132319 bytes) Dusting out the tube.
Esc00019aaa.jpg (111109 bytes) Installing the mirror.
col02.jpg (51578 bytes) Collimation

Re-coating the same mirror two and a half years later.


Ahead to 8_inch-d.htm

BACK to 8_inch-a.htm

BACK to 8_inch-b.htm

BACK to alt_11.htm

BACK to alt_12.htm