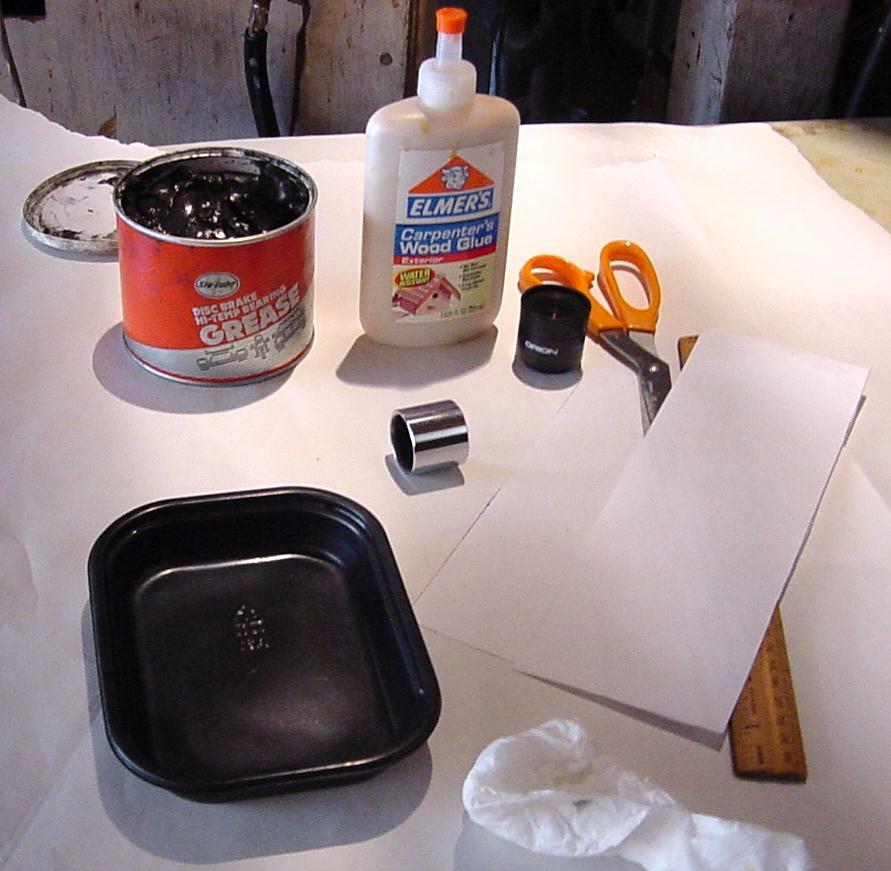

Building an eyepiece tube with a scrap of wood and a sheet of printer paper.
|
Here we have a sheet of non glossy printer paper cut into 3 inch strips that will become our eyepiece tube. |
|
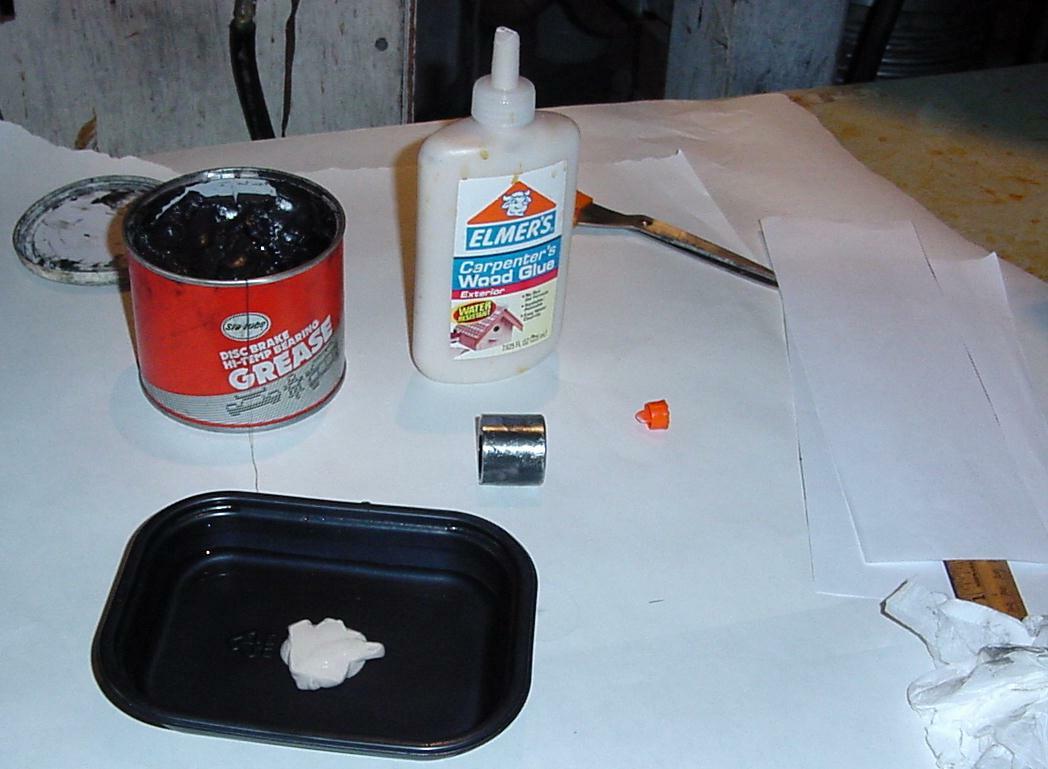
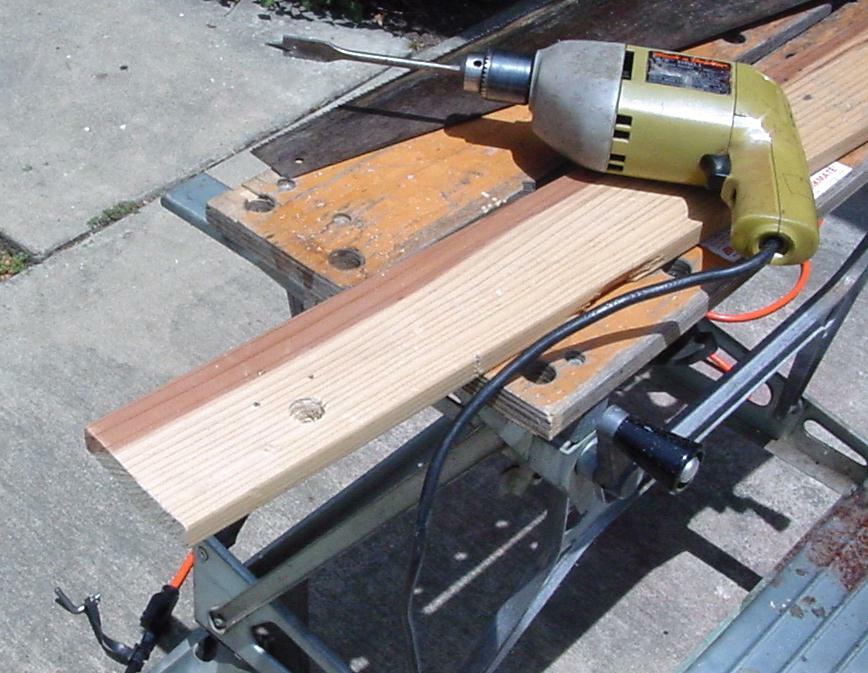
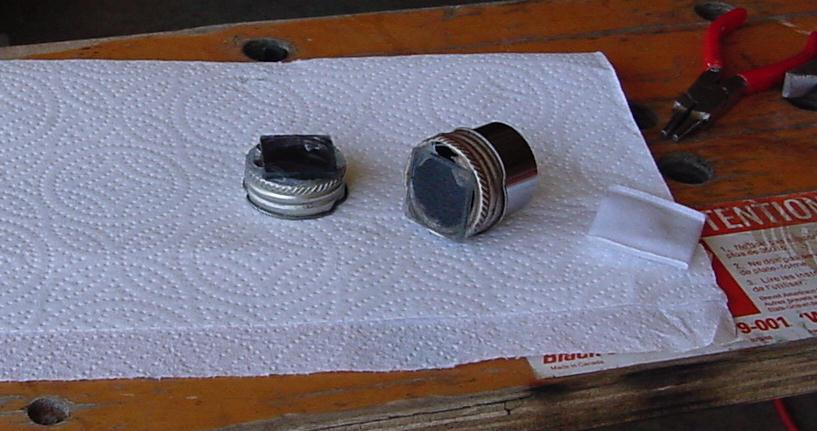
The 1 1/4 inch barrel on our eyepiece can be unscrewed without the eyepiece lenses falling out. This is not true of all eyepieces. We put the lens section away and grease the barrel with car grease. We mix some carpenters glue or white glue with water. |
|
We saturate the paper in the glue mix and it becomes very fragile. With steady (?) hands we wrap the soggy paper around the tube without any wrinkles, or maybe just a few. Two three inch strips and the remaining strip around the middle. We stand it up with the eyepiece barrel on the table. After standing overnight we put it out in the sun for a couple of hours to bake. The tube is now very light and stronger than egg shell. |
|
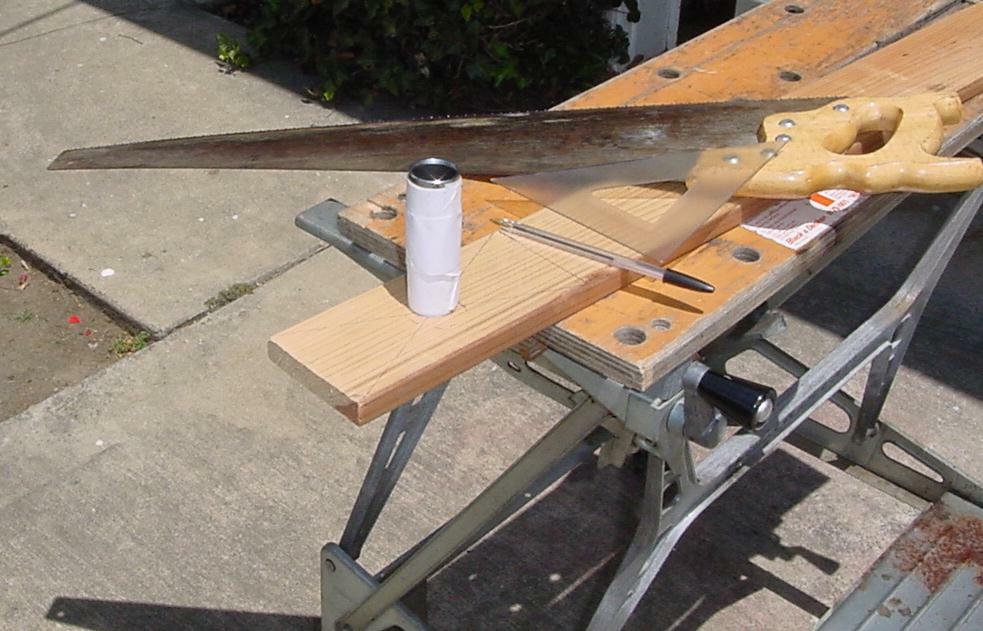
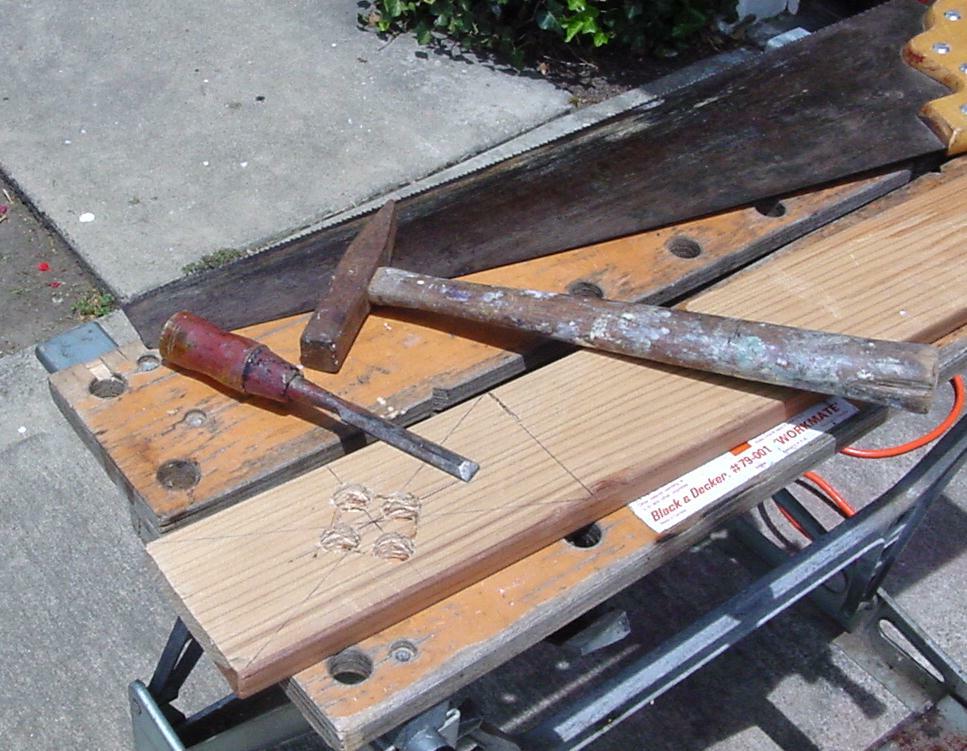
We found a piece of finished 1 x 4 to use for the mounting flange. We started to saw it off but decided to wait because we can hold onto it better this way. Here we are marking the eyepiece tube hole in the center. |
|
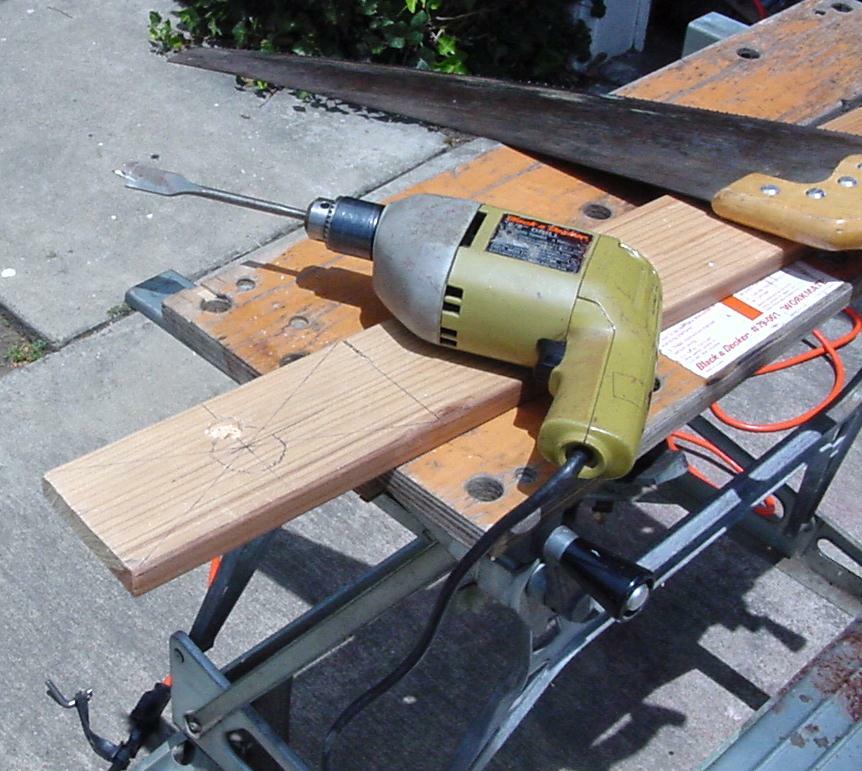
We didn't have a 1 3/8 spade bit so we drilled four smaller holes. We drill until the tip of the bit breaks through the back of the board. |
|
Then we turn the board over and drill from the back. |
|
Using a chisel we remove the wood between the holes. |
|
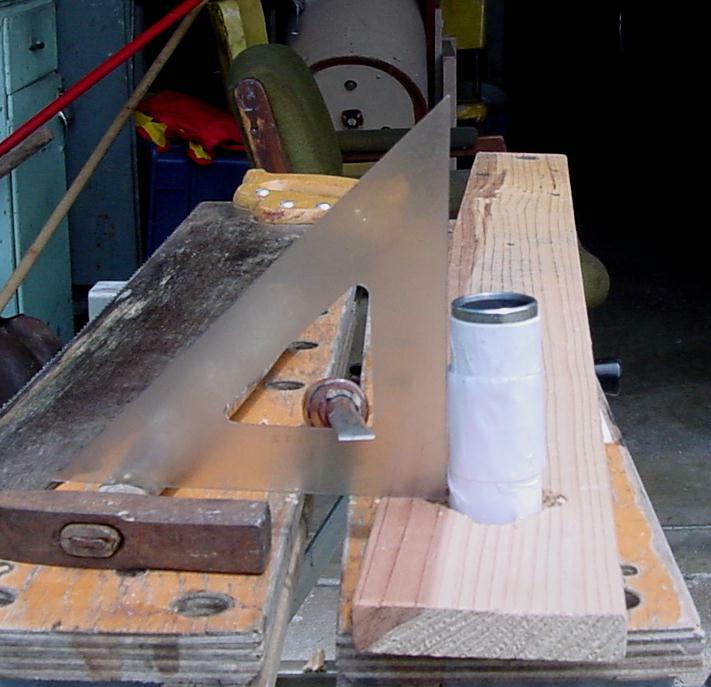
OK, it fits now. We want to make sure that we can get it square with the board. If it can't point toward the center axis of the tube we have a problem because our diagonal will be in the center. We remove the eyepiece barrel from the paper tube and clean with paint thinner and reinstall on the eyepiece. |
|
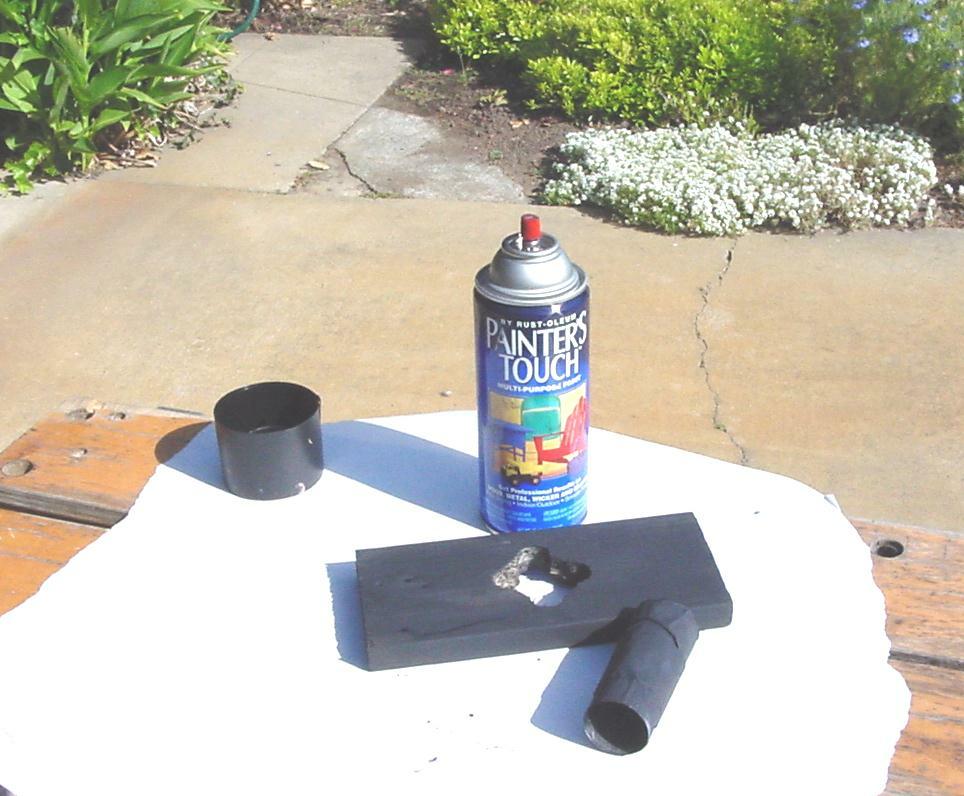
Next we spray-paint flat (primer) black inside and out. |
|
Next day the paint is dry and we glue with four buttons of silicon sealant and the next day here it is all done. We didn't use too much silicon seal in case we need to make some adjustments. The eyepiece has a focus range of almost 1/2 inch. Once it is in focus tape it with a bit of masking tape to keep the eyepiece from falling out of the paper tube. |
If the focus range is not in the correct range you can change the range plus or minus 1/4 inch with the mirror cell adjustment screws. Otherwise you will need to pull off the buttons of sealant and re-glue at a different length. Well, it has some problems but the price is right and if you don't have an eyepiece yet you can use it for the ronchi grating.
After the mirror is in the mirror cell in the tube and the diagonal is installed you can point the scope at the moon and find how far the prime focus is outside of the tube. The eyepiece is like a magnifying glass for looking at the prime focus. You can look through the eyepiece at a piece of paper on the table and have someone measure from the top of the eyepiece barrel to the paper. This will help to get the eyepiece tube to be the right length the first time.
 |
If you want to go a step above the papier-mâché focuser and still build your own then the 'drain tube focuser' is a good selection. |
To find the magnification of a six inch primary with a 12 mm eyepiece divide the primary focal length by the eyepiece focal length. Find the focal length of the six inch mirror using the moon and convert the inches to millimeters by multiplying by 25.4 mm per inch, then divide by 12 mm. So if the focal length is 45 inches times 25.4 = 1143 divided by 12 mm = 95.25 magnification power.
Building a Camera Mount for Astrophotography and Ronchigrams
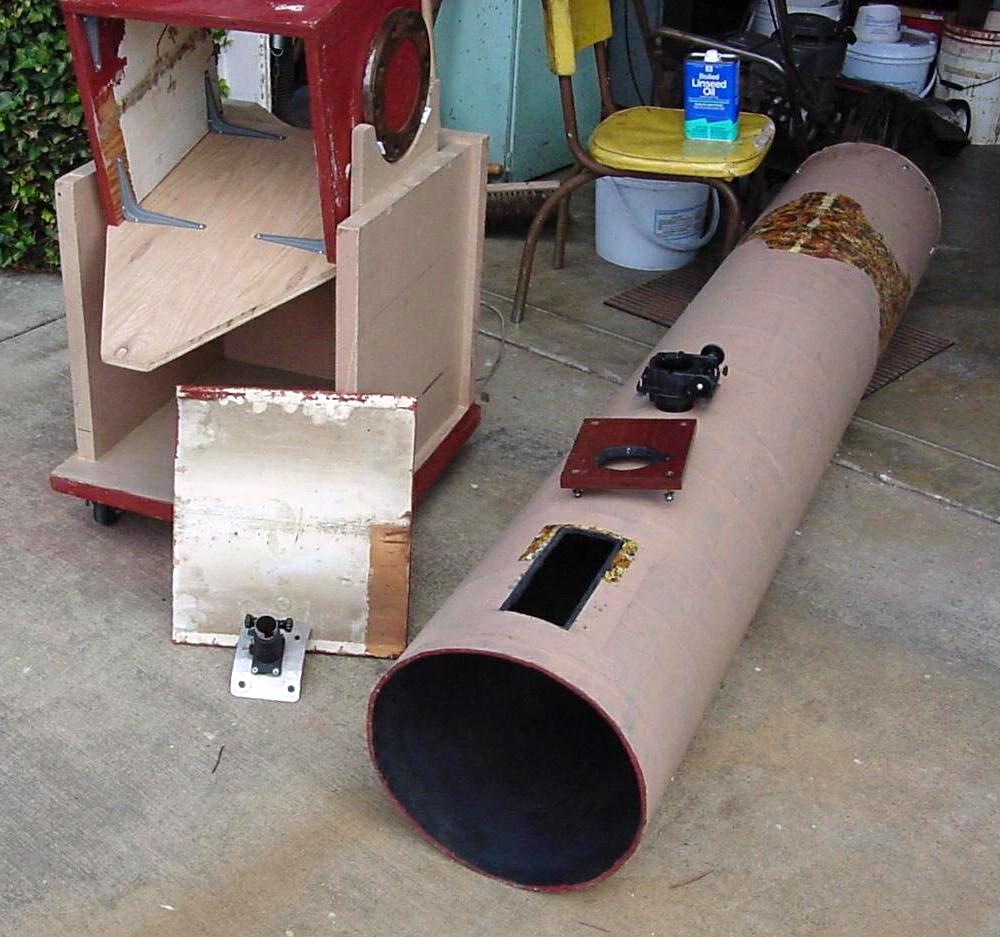 |
Here is our 30 year old Dobsonian telescope. We have replaced the bottom plywood in the tube box and removed the old focuser. The old cardboard tube is still good but the area at the eyepiece has lots of holes because we changed our minds a few times. We bought a pre-finished board at Home Depot and cut a large hole in the tube so we can partly recess the pre-finished board into the tube. |
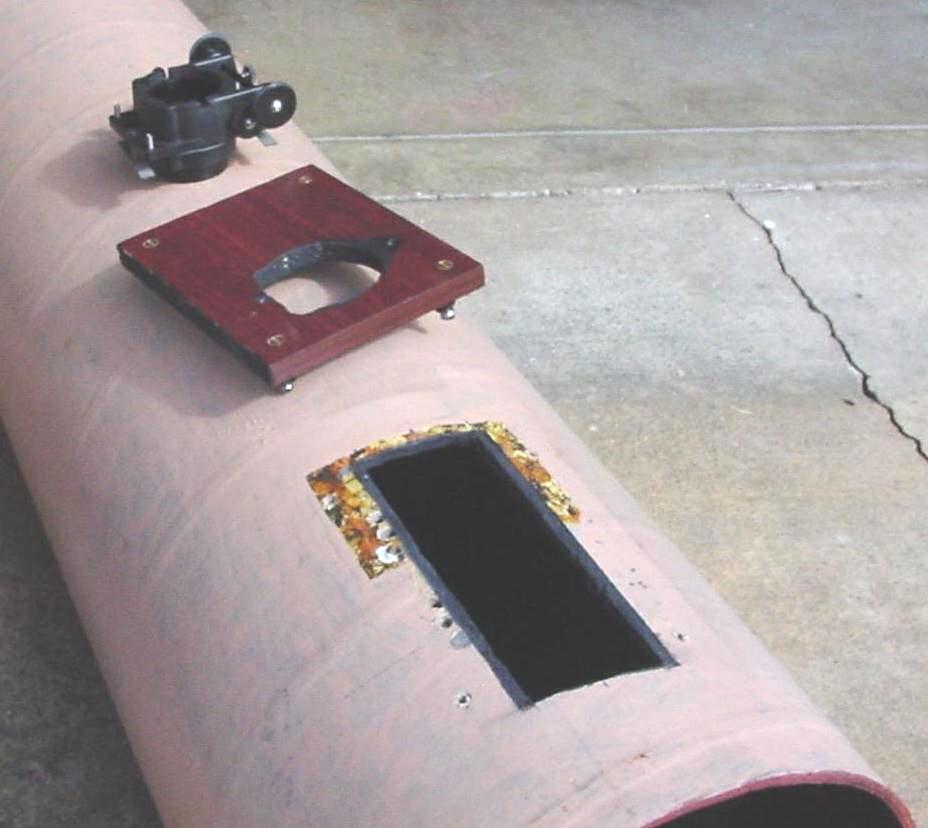 |
Here is our new Crayford Style low profile focuser made by AstroSystems. The focuser comes with instructions for mounting on the tube. |
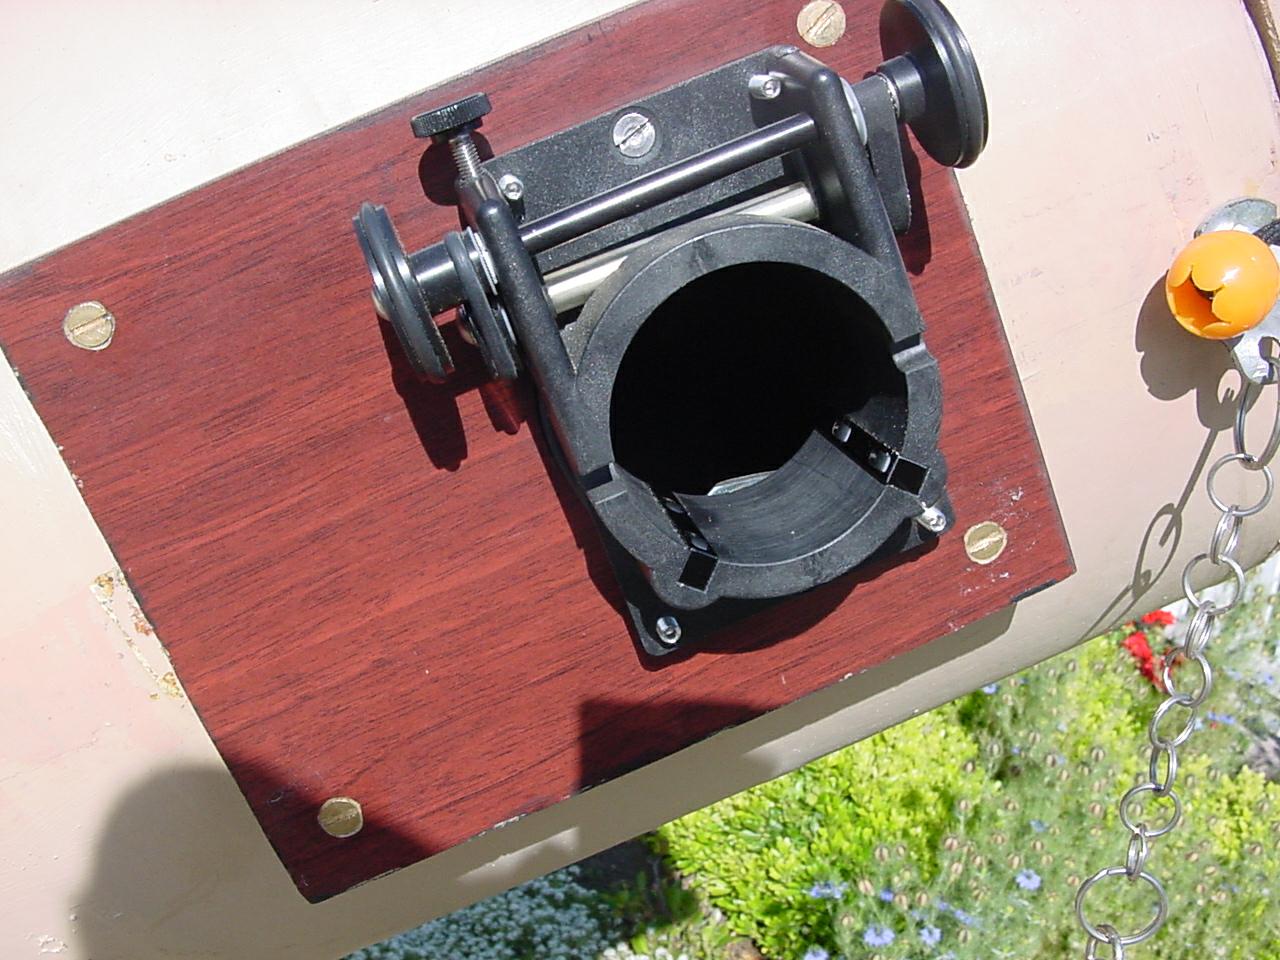 |
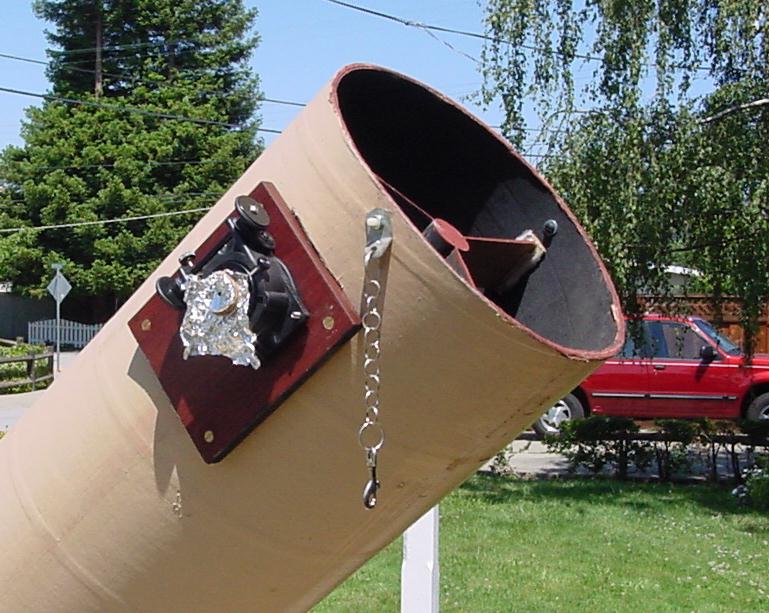
The focuser has ball bearing rollers on the bottom and a spring loaded friction shaft at the top which is tensioned against a flat on the 2 inch eyepiece tube. The chain at right is made of small key rings. We clip the chain to the camera strap in case the camera falls. It also keeps the tube in balance when the camera is removed temporarily for adjustments. |
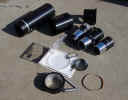 |
Here are our eyepieces and adapters. When you buy an eyepiece a good choice for a six inch F 8 would be a 12 mm eyepiece and for a 12 inch F 6 a 15 mm eyepiece. I have a 9 mm eyepiece that I hardly ever use because without setting circles and a clock drive it is hard to find and track. Except under unusual conditions magnification more than 150x is just magnifying turbulent seeing. Most amateurs will tell you not to buy a 6 mm eyepiece. |
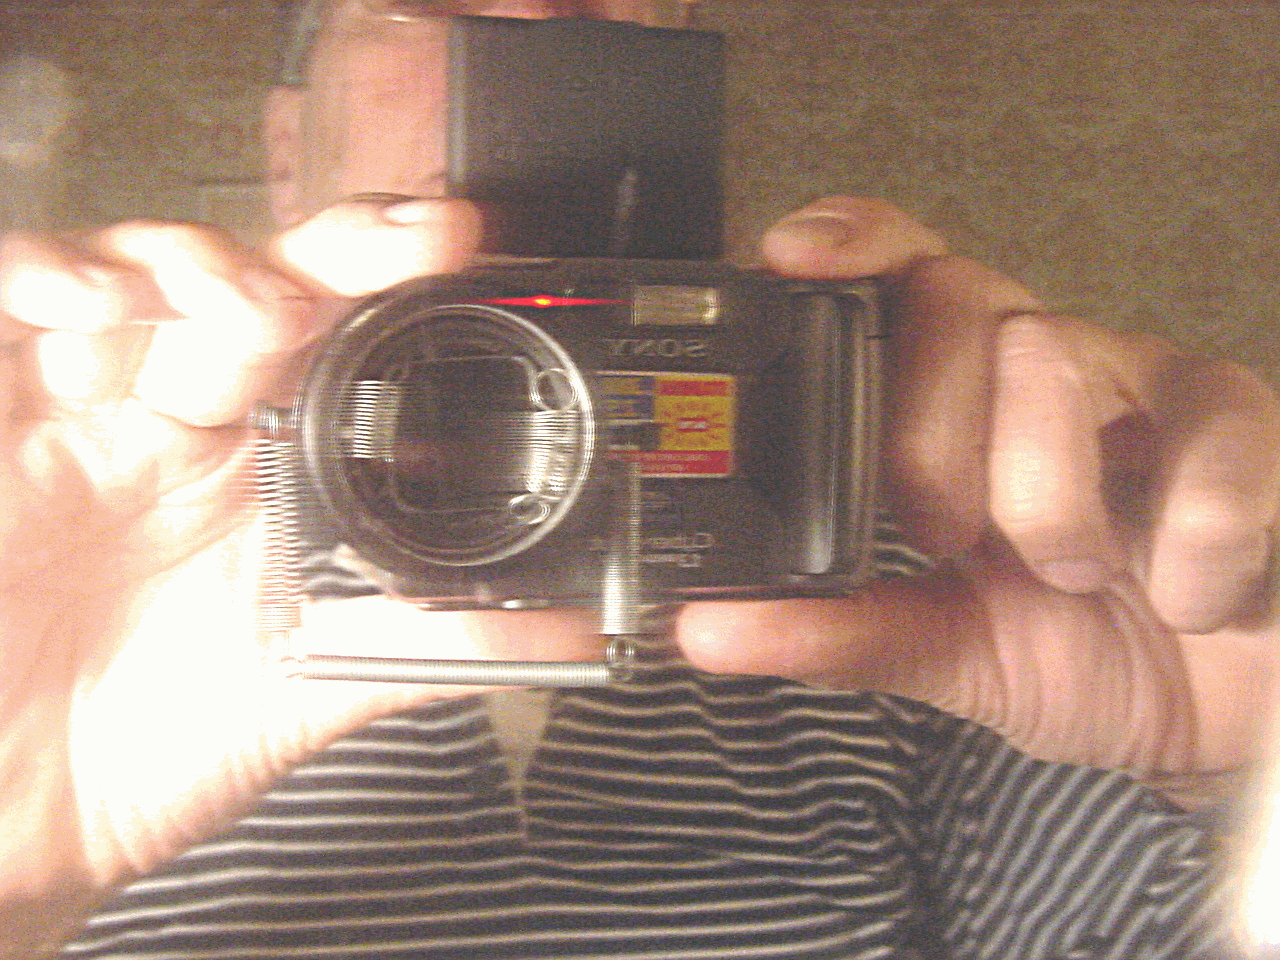 |
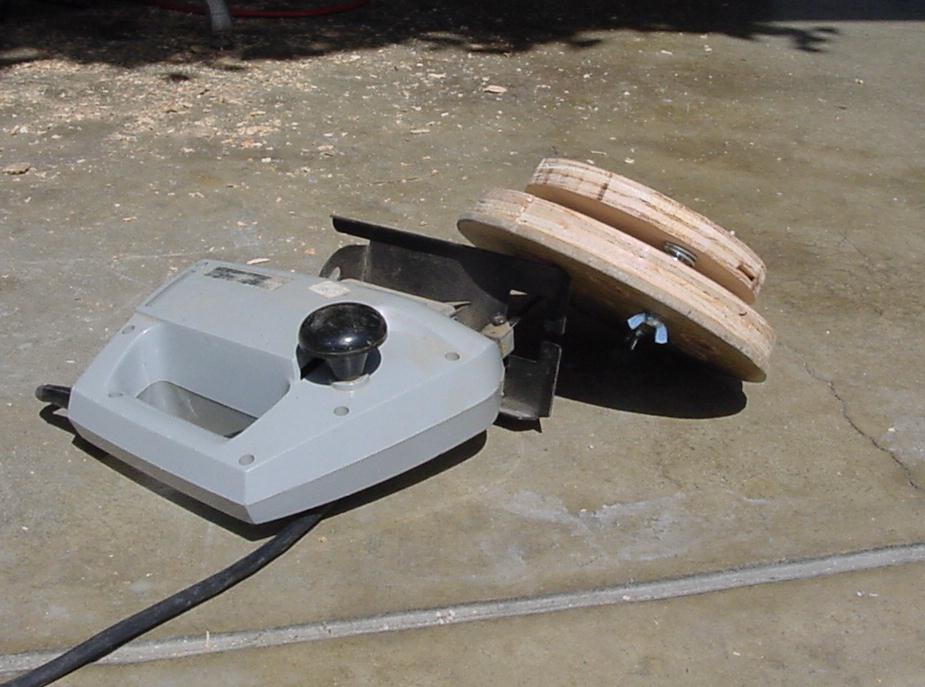
Here the Sony S30 digital camera takes a picture of itself in the bathroom mirror. The ronchi grating can be seen in the center of the ronchi grating adapter. The ronchi grating adapter was made from a UV filter we bought at the camera store. The corners of the ronchi grating were sanded off to slip inside against the UV filter. We pin drilled four holes for the grating retainer springs. Also seen is the camera adapter that adapts from the tapered camera lens barrel to the 2 inch eyepiece tube. Most of the ronchi grams were taken with this setup. |
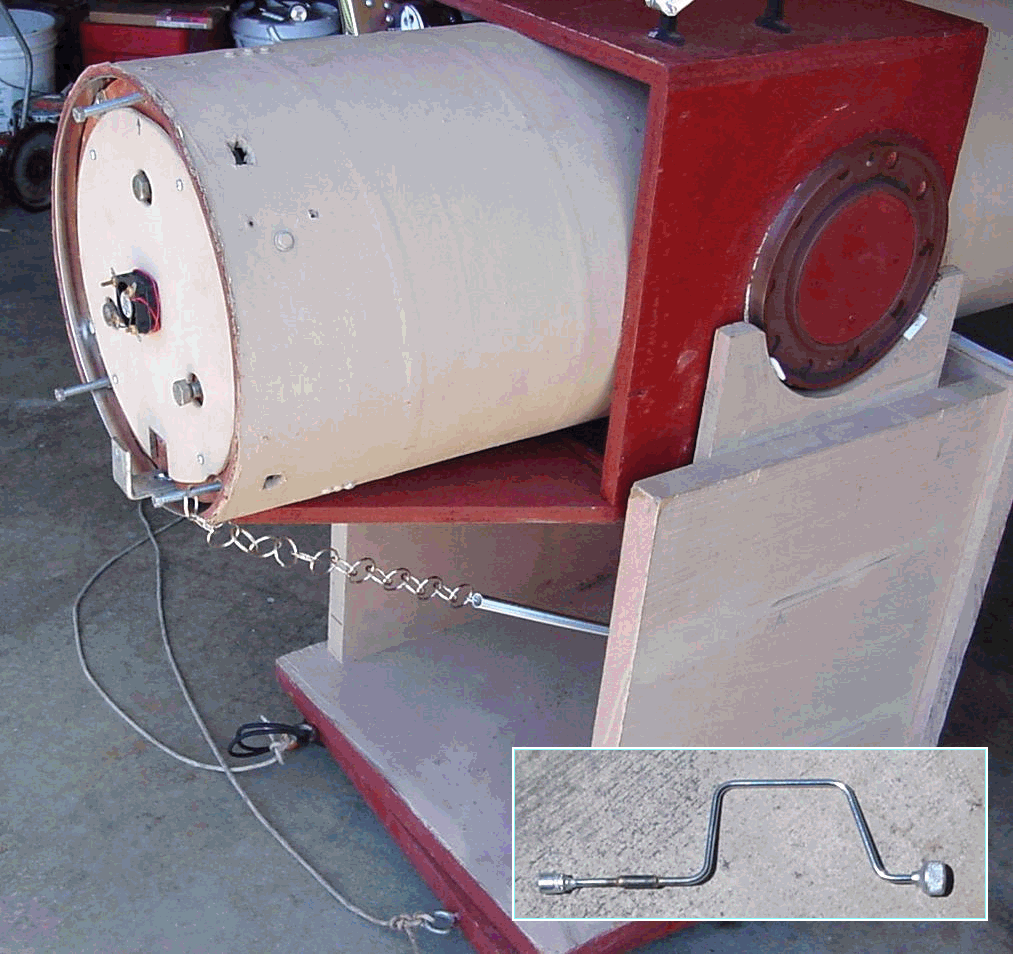 |
Installing and removing the camera changes the balance
point of the telescope. We tried adjustable counter weights but this
screen door spring and key ring links works much better.
Taking pictures at 250 feet requires that the mirror be moved back in its cell. We added snubber bolts to steady the mirror cell plywood when the mounting bolts are loosened. The small speed handle makes adjustment speedy. Of course after moving the mirror back the scope will need to be collimated again. |
Finding the ratio of arc seconds to pixels in the camera.
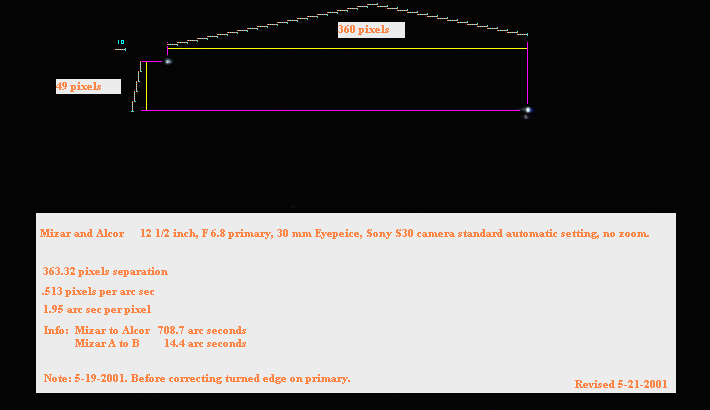 |
The star at the bend in the handle of the big dipper is Mizar and Alcor. If your vision is better than 20/30 or so you can separate these stars without binoculars. Through the telescope Mizar is discovered to be two stars. |
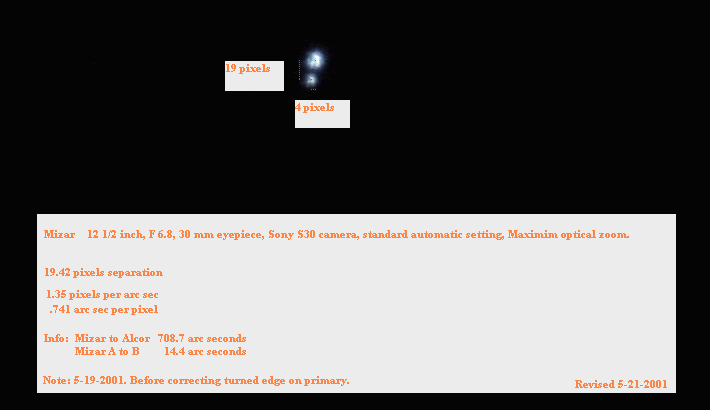 |
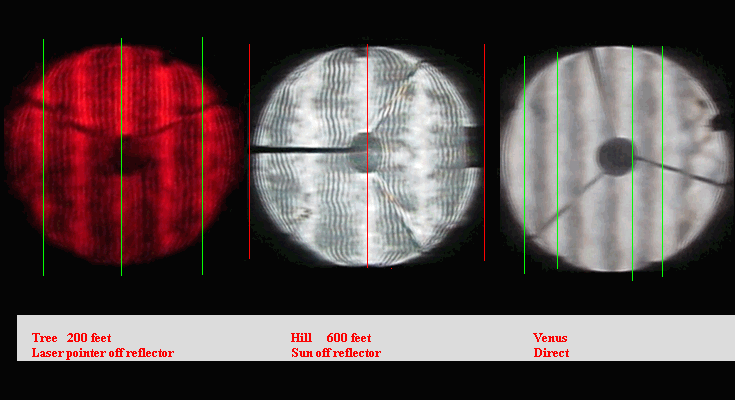
We used these stars with known separations to calibrate the camera. The resolution of the camera with the primary mirror and atmospheric conditions as they were appears to be about 3 or 4 arc seconds. If we look up the declination of Mizar and take the cosine of the declination we should be able to determine how long a time exposure we can use before the star turns into a star trail. |
Stars travel 1 degree every four minutes. There are 3600 arc seconds in one degree so a star at the celestial equator will travel one arc second in .01667 second or 4 arc second in .0667 seconds.
Finding the Field of View of an Eyepiece
In the winter constellation of Orion, the hunter, the middle star in Orion's belt happens to be on the celestial equator. If we start a stop watch when this star enters the field of view and stop the watch when it exits and the star travels across the center of the field of view we can multiply the seconds by .25 to get the eyepiece field in arc minutes. So if it takes 30 seconds to cross the field, 30 * .25 = 7.5 arc minutes field of view. Often the image quality at the edge of the eyepiece field of view is not too good. On a Dobsonian this extra low quality field is still useful when trying to locate objects by scanning the telescope.
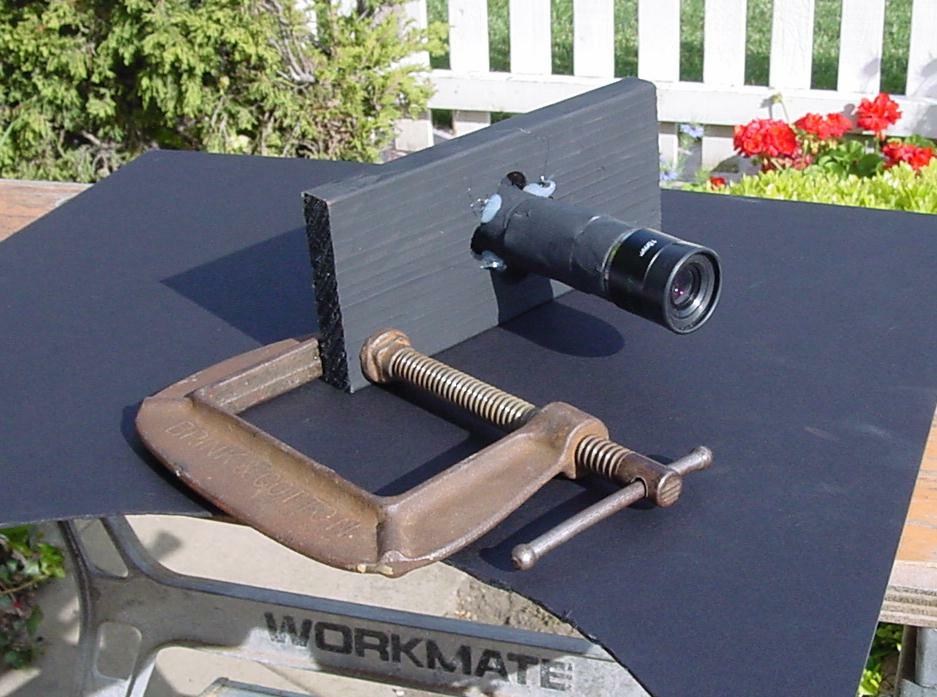
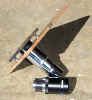
Using Webcams in your Telescope
From Sky and Telescope, June, 2003
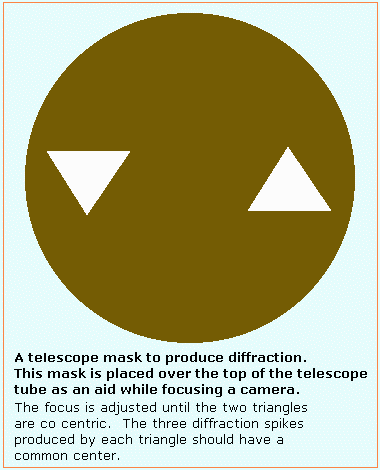
The focusing mask at right can be used to focus cameras that have a focusing screen or to focus a webcam CCD.
Finding and the Finder
Presume we have just finished our telescope and now we want to look at an astronomical object. We have no finder, nothing but the telescope. If you have more than one eyepiece use the lowest power, longest focal length eyepiece to get the biggest field of view.
 |
To adjust the left/right, azimuth, stand centered behind the telescope. |
 |
To adjust the up/down, altitude, get down on the ground
beside the telescope.
If you don't do this the telescope will seem to be pointed correctly when it is not due to parallax. Go to the eyepiece and sweep back and forth or around the star field and if you are lucky you will find whatever it is. Take your glasses off if they restrict the eyepiece field of view. Sometimes when trying to find planets it helps to take the eyepiece out of the telescope and center the planet image in the eyepiece tube. |
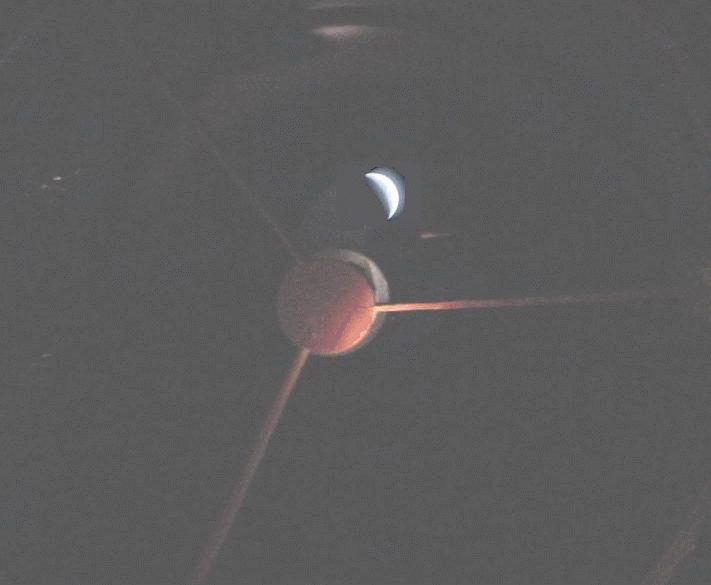 |
The moon is so bright it is easy to find. Here we stand in front of the tube and see the moon reflected in the primary. One would think the camera and our head would block the incoming moonlight but obviously this is not always true. If we are seeing the reflected moonlight then it is not hitting the diagonal. Move the scope until the reflection disappears behind the diagonal. |
As the first person looks through the eyepiece the first thing you hear is "WOW..." and then "It's moving?". And of course the standard answer, "no its the earth turning". If you plan to do the guiding and don't know which way to move the scope to re-center the image the best bet is to grab the top of the tube and pull the telescope in the direction of the sunset. Everything seems to move the wrong direction in the eyepiece but after a few minutes practice it will seem normal. After you are able to guide a bit put your eyeglasses back on and refocus the image so others can see the focused image that you see.
Eventually you will probably want a Telrad or a finder. There are those who always use a Telrad and others like me who prefer a finder. The people who prefer the Telrad often seem to be proficient amateur or professional astronomers who have more or less memorized where the objects they are looking for are located in relation to fixed stars. People like me live in the city and can only see a few of the fixed stars and don't know precisely where the 'faint fuzzies' like M13 and the Andromeda galaxy are in the sky.
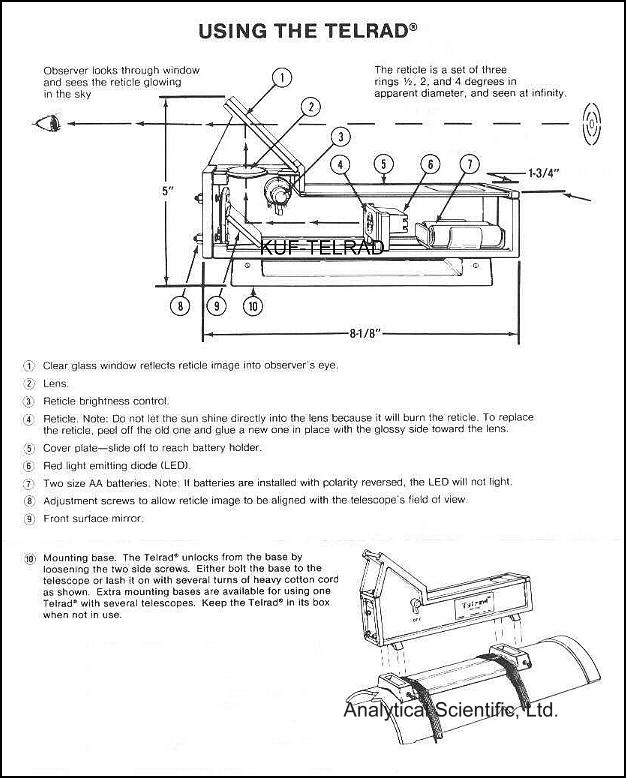 |
The Telrad doesn't magnify at all. It displays an illuminated target against the sky. Since the user already knows how far the object is from a fixed star the target is all that is necessary. The term 'fixed star' is derived from very old beliefs about the night time sky. It was presumed the stars were fixed to something otherwise they would fall to earth. It was noted that the sun and planets gradually move in front of the fixed stars. |
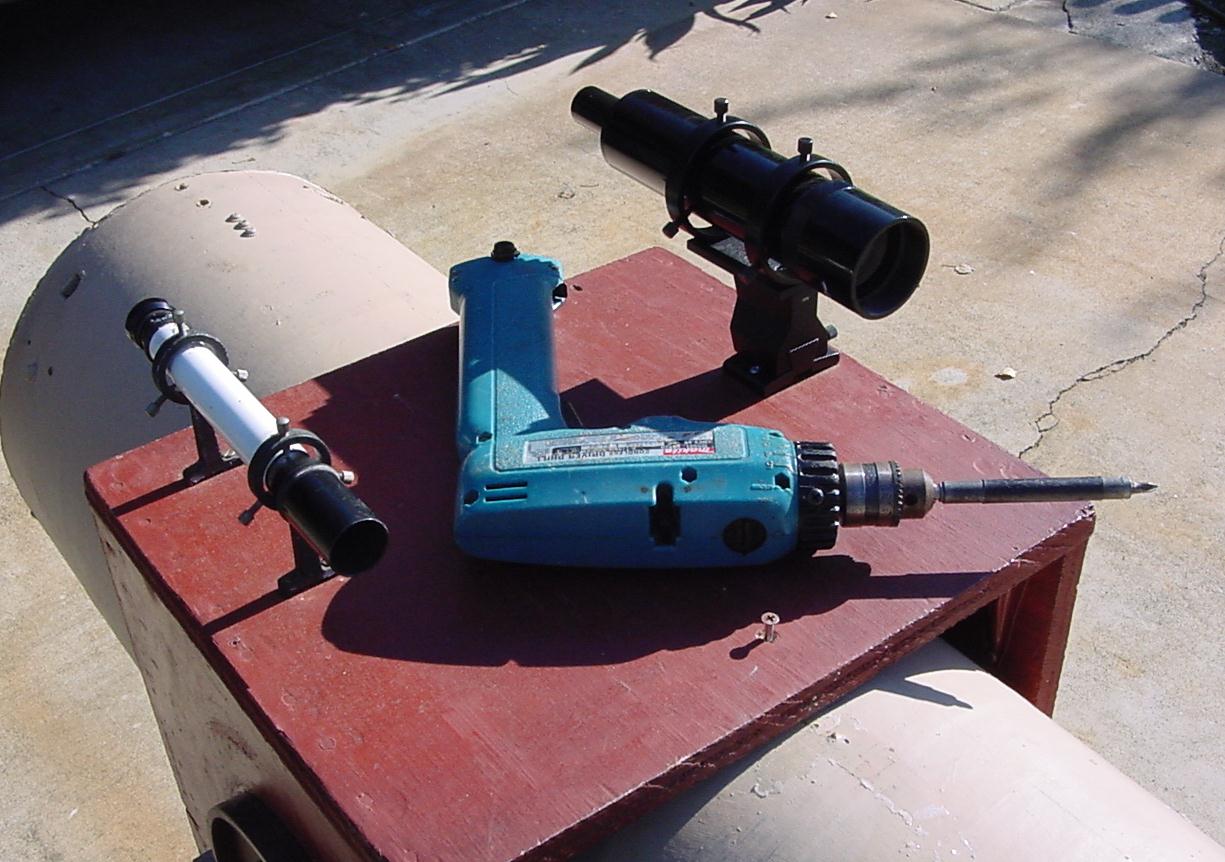 |
Here we see two finders. The small one is great for finding planets. To barely see the 'faint fuzzies' in the city you will need the larger finder which can be bought from Orion Telescope. The finder needs to be realigned with the telescope almost every time the telescope is set up. Find a bright star in the main scope and adjust the finder screws until the star is on the cross hairs in the finder. It takes a bit of practice and if you take very long the star has moved. ( I mean the earth has turned ) Once the finder is properly aligned you can find your object without changing to low power in the main scope. I prefer the straight through finder so I can look directly at the stars with one eye and through the finder with the other eye. The cross hairs seem to project on the sky which helps in getting the object into the finder field. In really dark locations away from the city you may need a small LED or flashlight to illuminate the finder crosshairs. |
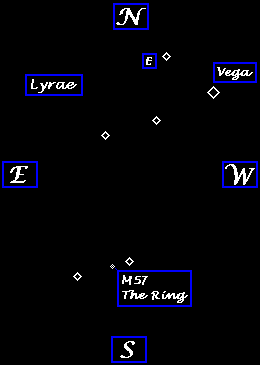
If the finder is not working try sweeping through Sagittarius, 'The Teapot', with a low power eyepiece. You will almost certainly find a globular cluster or two there. The ring nebula, M 57, in Lyra is also easy to find because it is between two stars that can easily be seen without a telescope. In the winter M42, the great nebula in Orion, is easy to find.
