Making and Tending the Pitch Lap
Making Pitch Laps
As done in John Dobson's Telescope Making Class
Making Pitch Laps at Chabot Space and Science Center
With the San Jose Astronomical Society
Molding a Pitch Lap, Two Methods
Trimming and Re-grooving the Pitch Lap
Don't Bother
Light Press
Medium Press
Heavy Duty Press
Pressing with a Screen, Texturing
Under Size Laps for Parabolizing and Pressing with Polyethylene
Using Vinyl Seat Cover Material to Press an Optical Flat Polishing Lap
Using both Polyethylene and Window Screen for an Optical Flat Polishing Lap
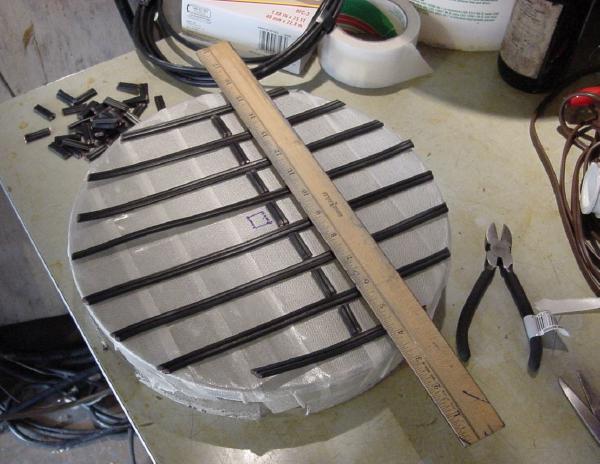
As done in John Dobson's Telescope Making Class
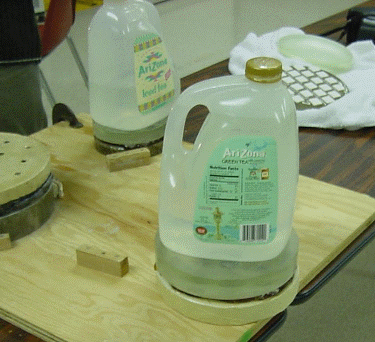
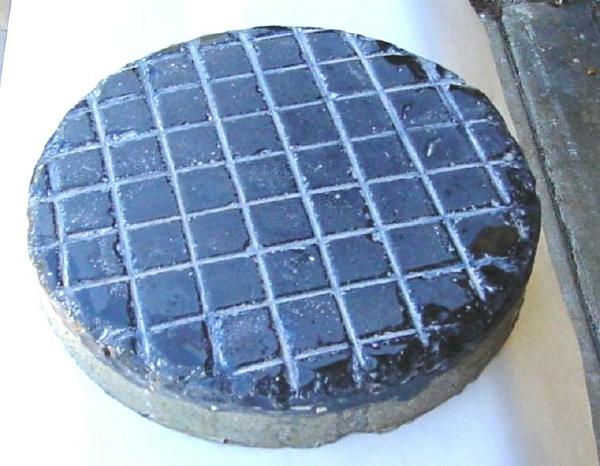
Making the pitch lap is well covered in John Dobson's Video. Mr. Dobson is able to make pitch laps for an entire telescope making class during one two hour session. The pitch is slow to melt so the needed amount of pitch is pre melted before the class. Basically partially melted pitch with the viscosity of heavy syrup is poured on the clean, dry tool, a wet 3/8 inch dowel stick is pressed into the partially melted pitch at 1 1/2 inch spacing and then again at right angles. The result is 1 1/4 inch square facets of pitch. The mirror is brushed with a mixture of cerium oxide and water and the mirror is then pressed gently onto the pitch to make the pitch take the shape of the mirror. After the pitch lap is poured the pitch will harden from the outside and remain soft inside for a while. You need to wait for the pitch lap to cool all the way through before pressing hard or you will lose the grooves or even slip the lap face from its support.
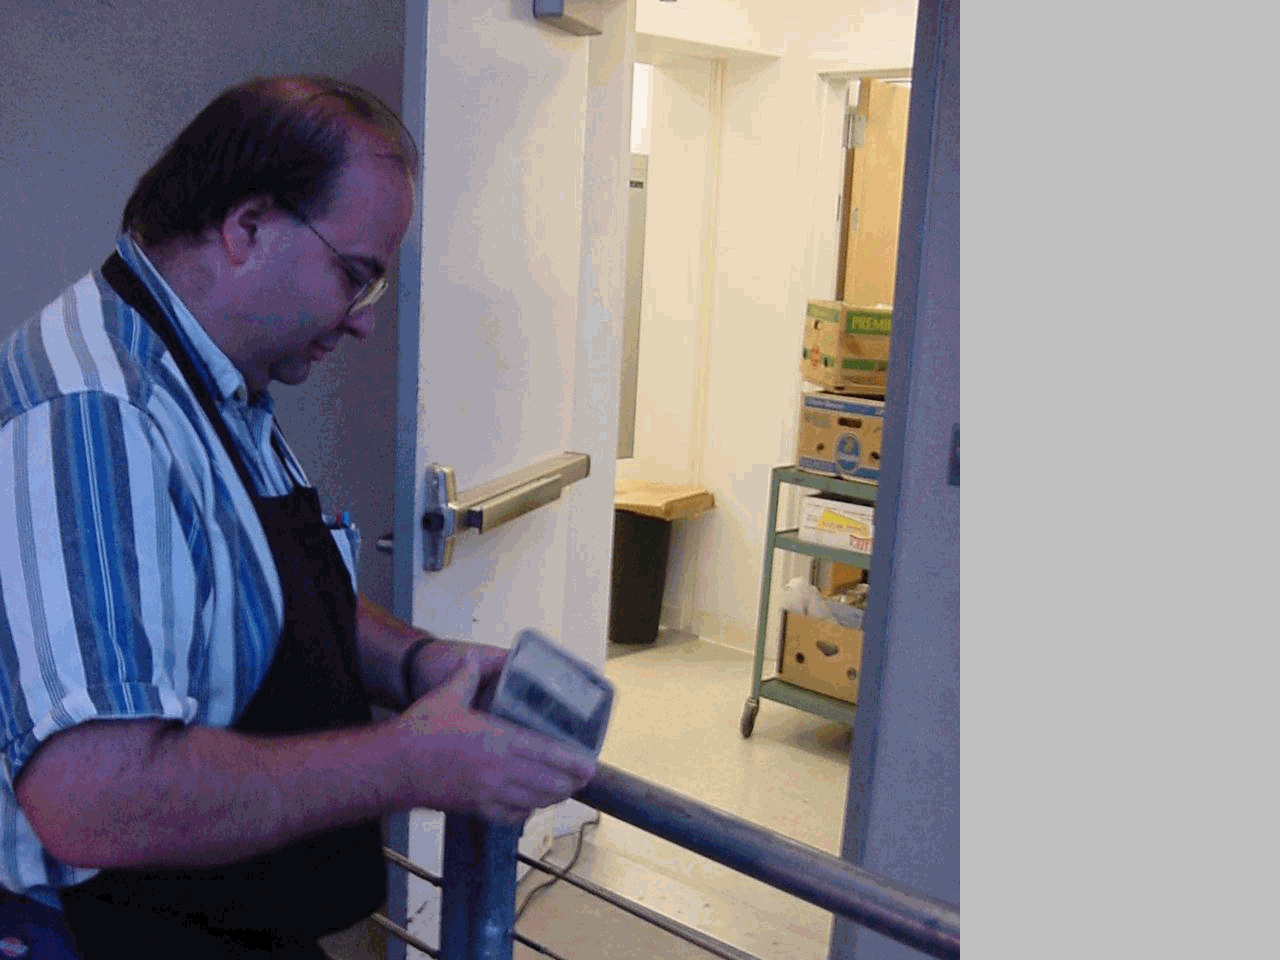
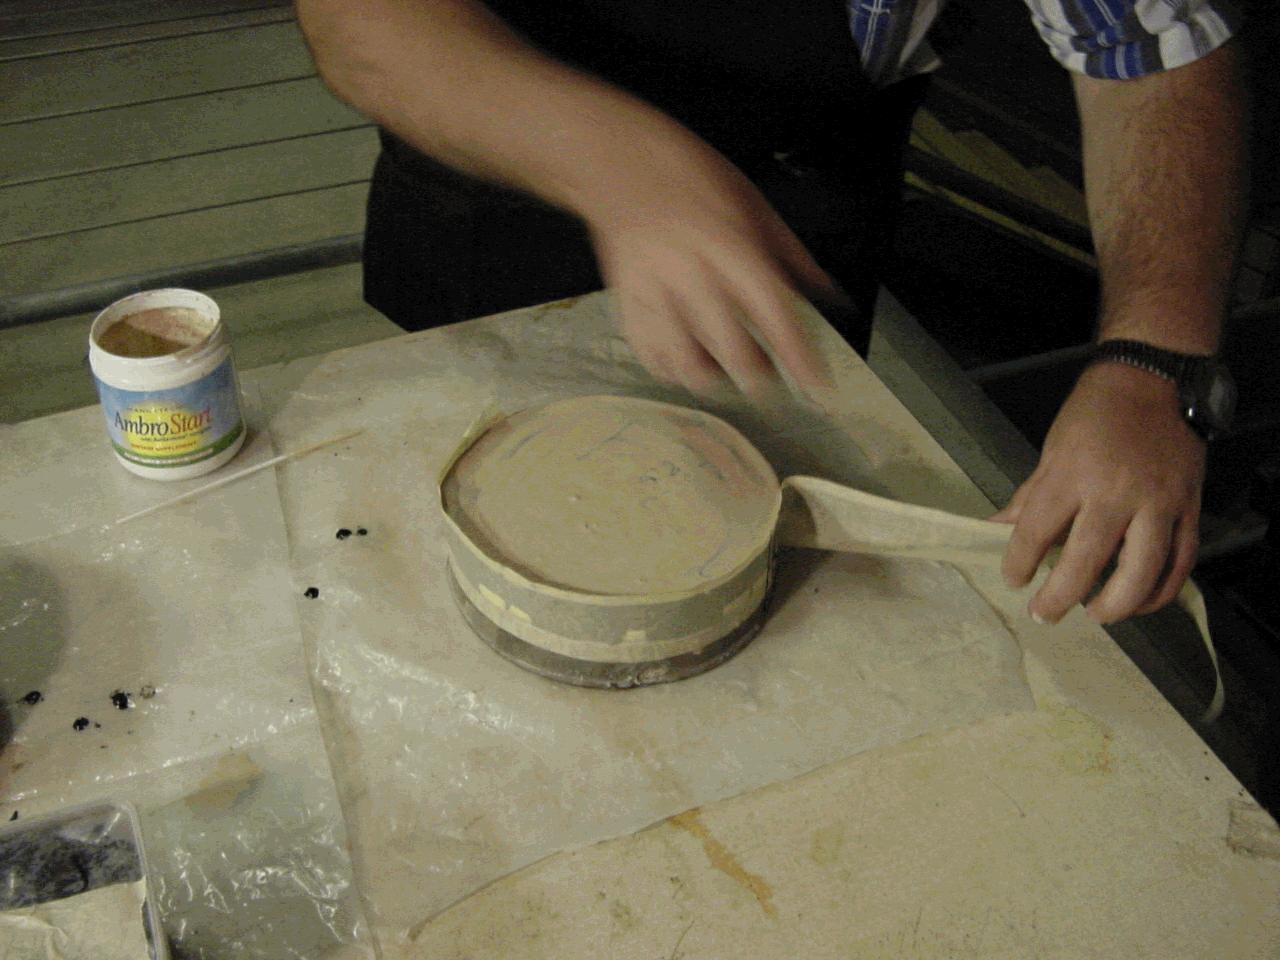
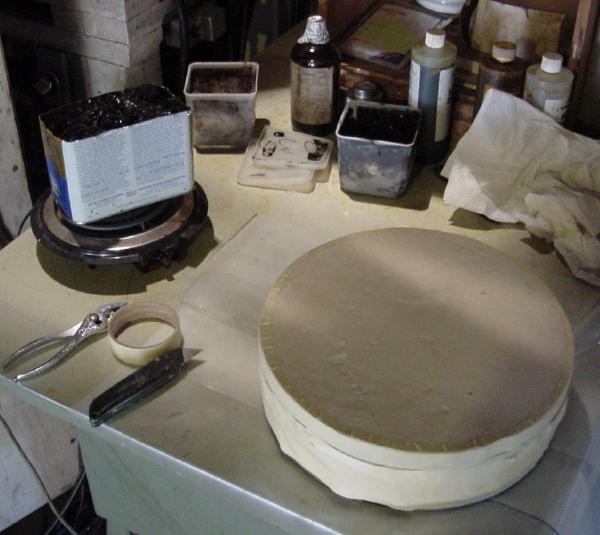
Making Pitch Laps at Chabot Space and Science Center
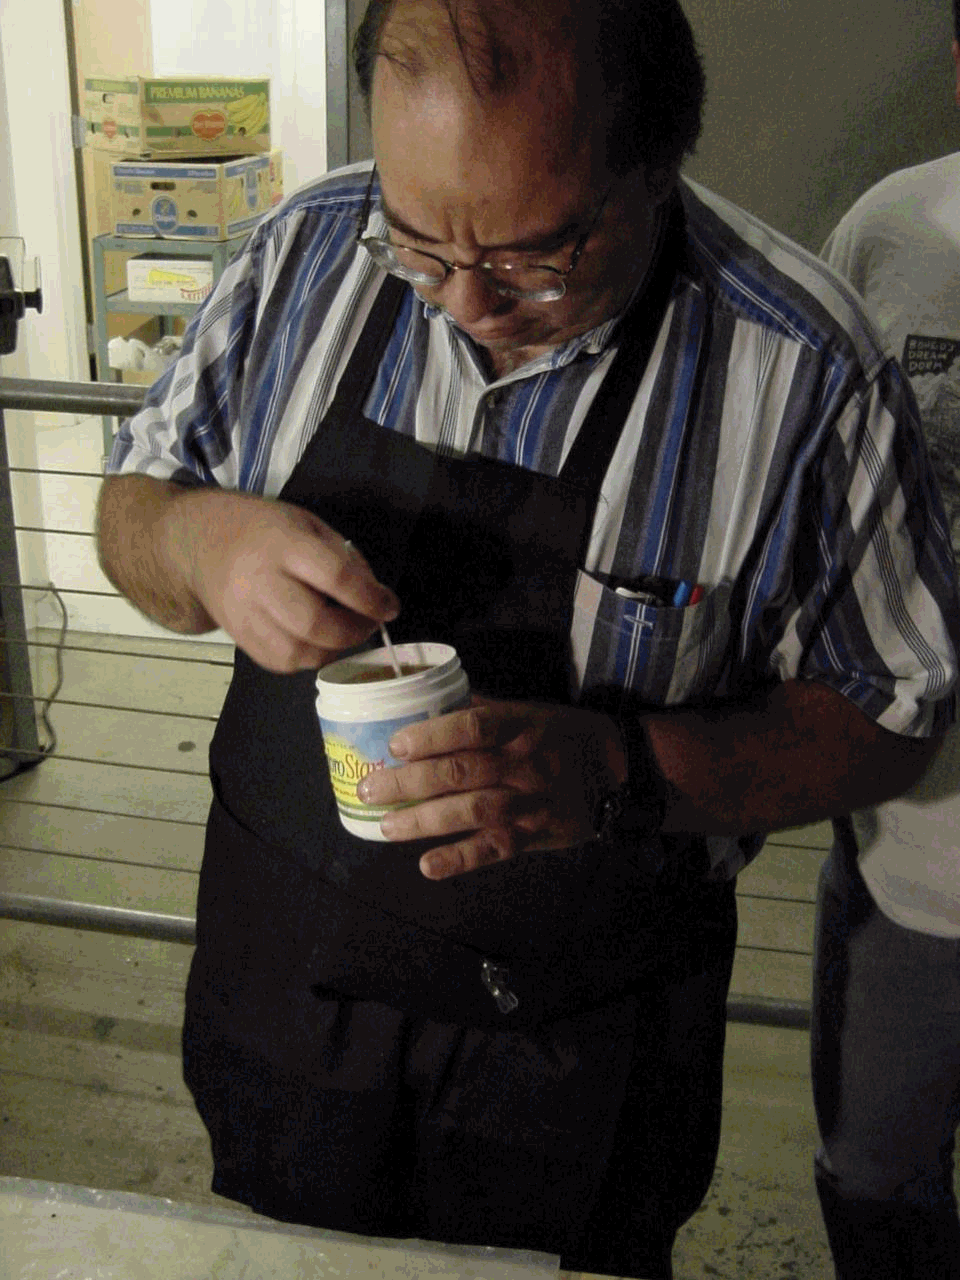
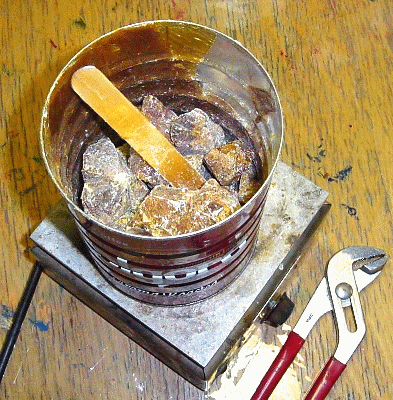
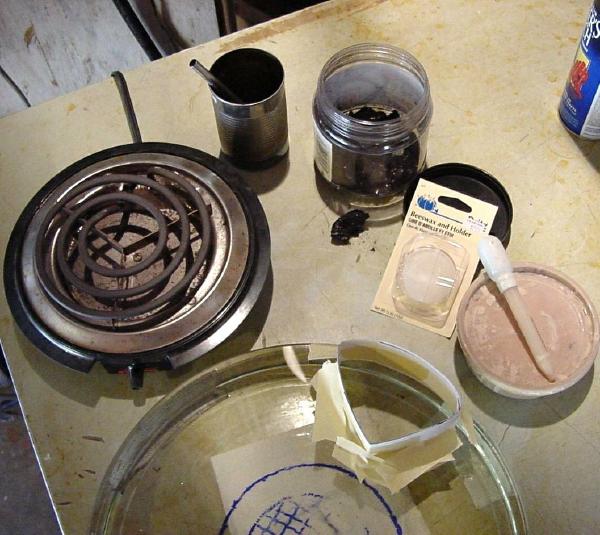
The pitch has been made available by Tensley Optical. Mark blends the 68 and 73 grades of pitch and stores it in polyethylene tubs for later use. The 68 and 73 has something to do with the temperature at which the pitch is to be used, the 73 grade being harder. Here the pitch is being cracked in the tub then dumped into the melting pot.
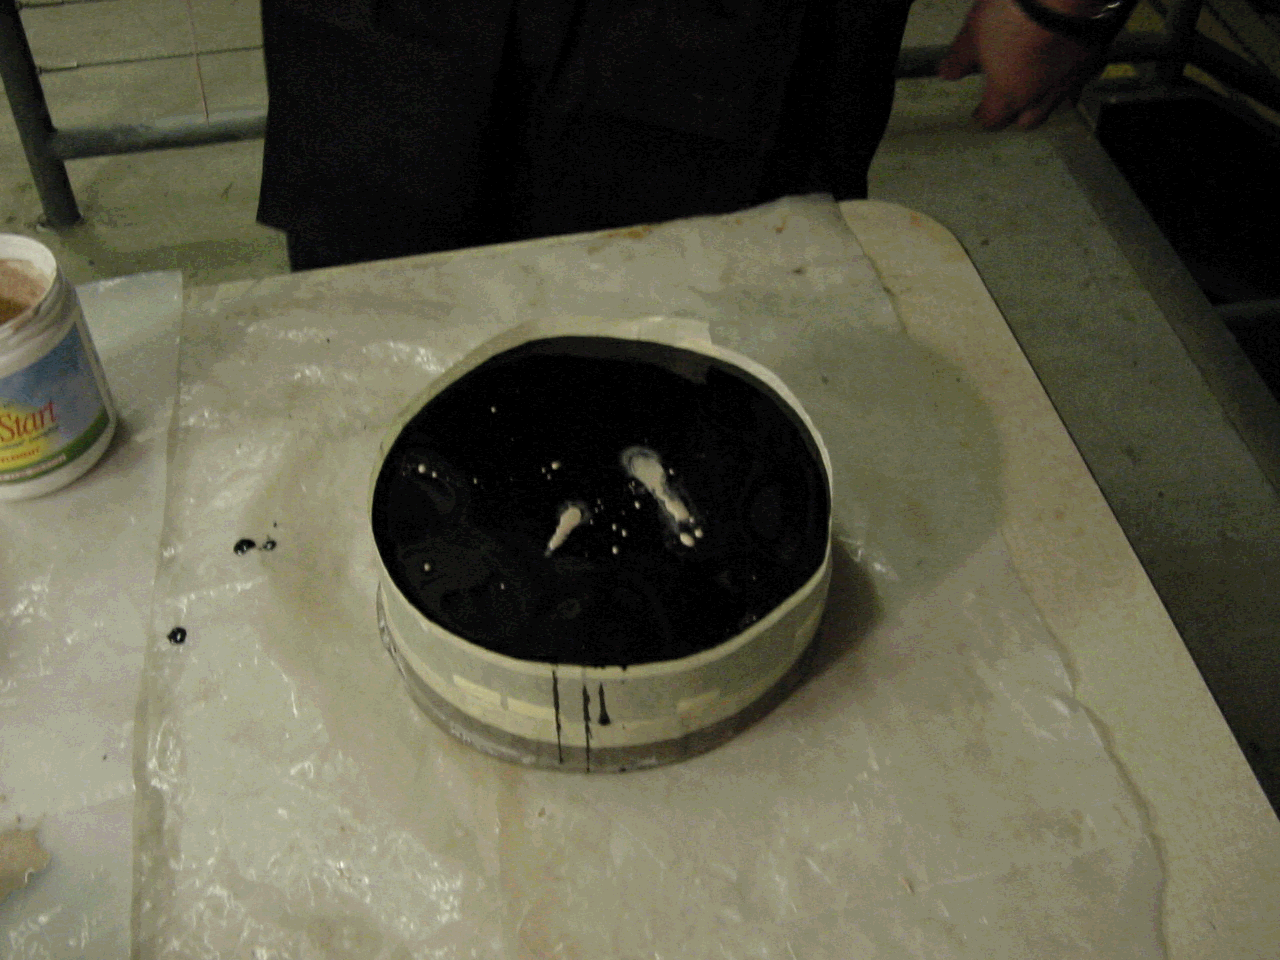
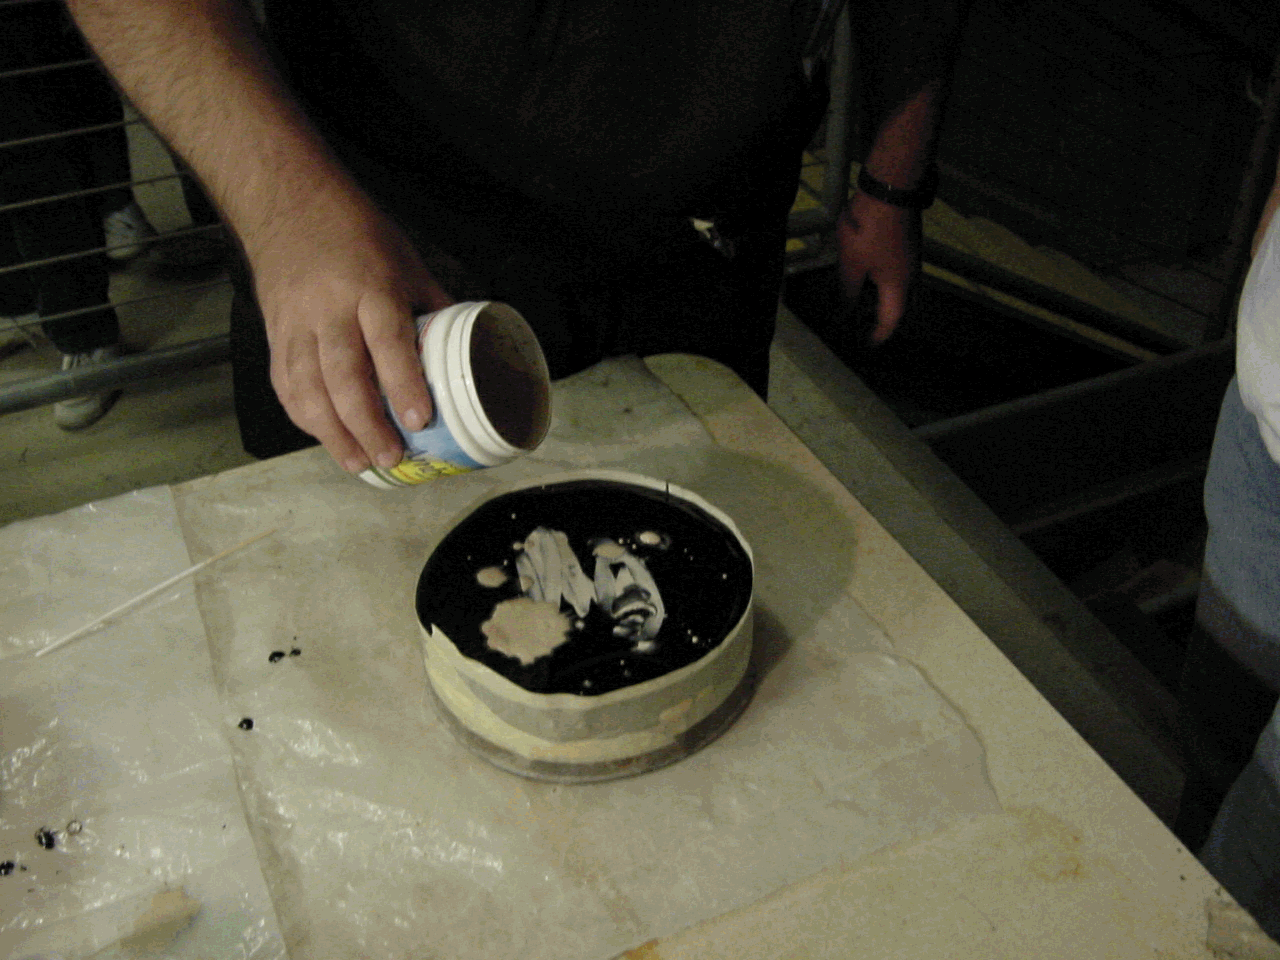
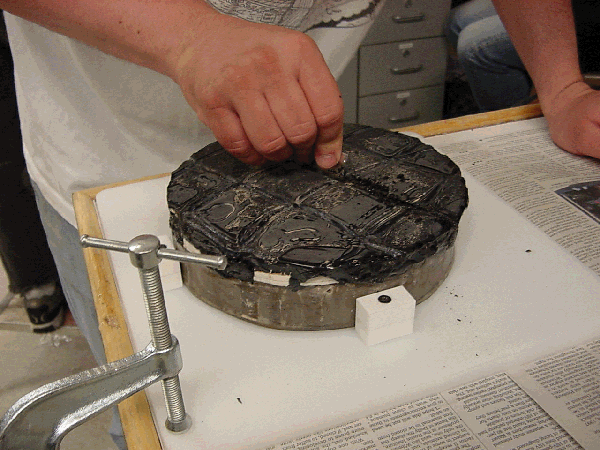
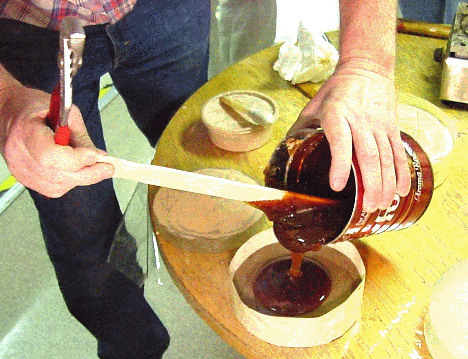
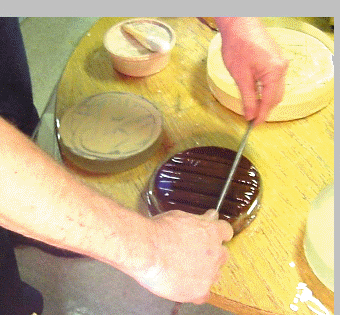
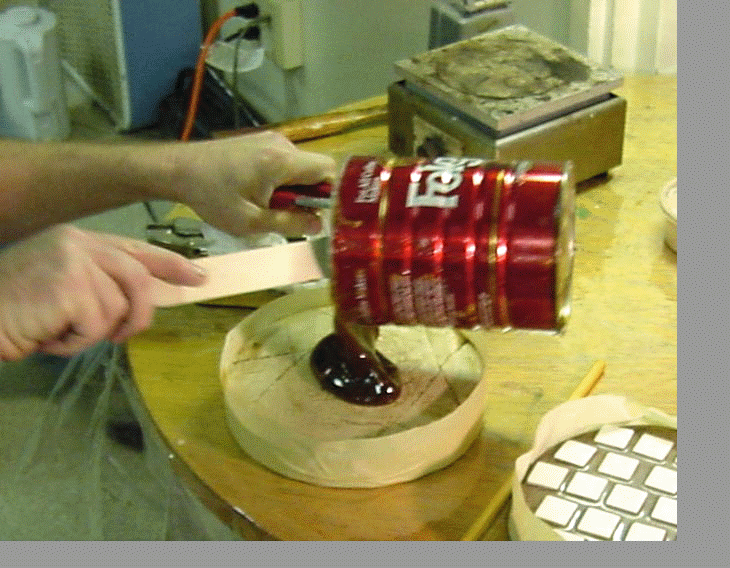
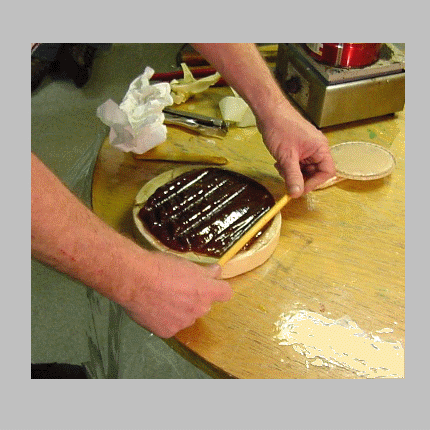
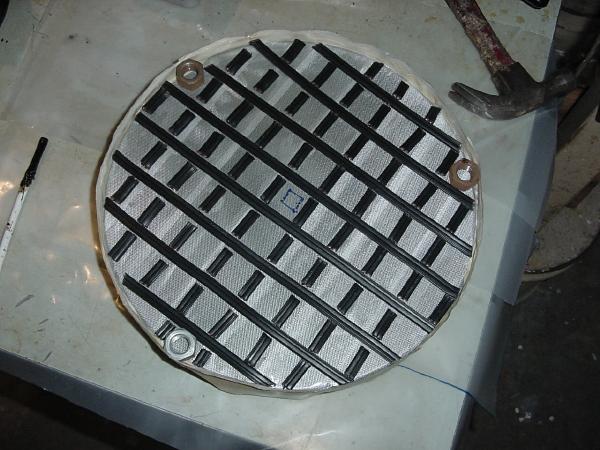
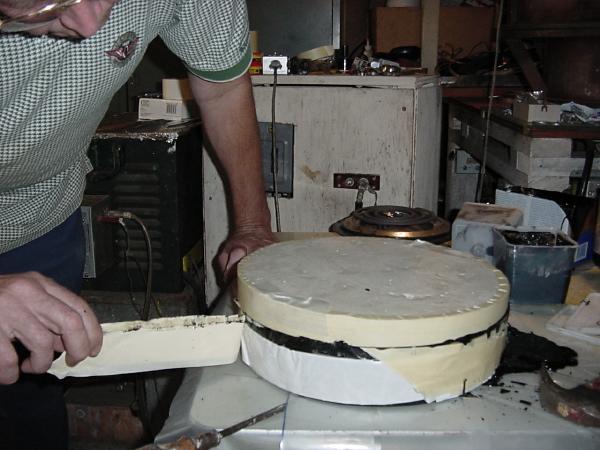
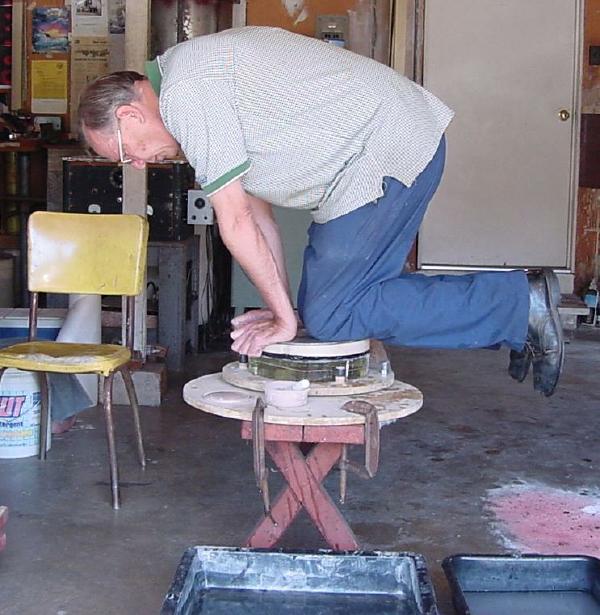
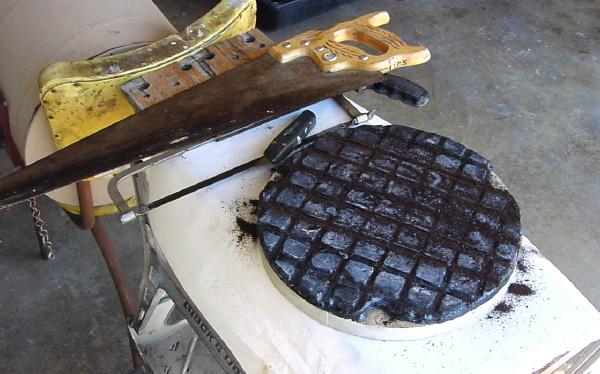
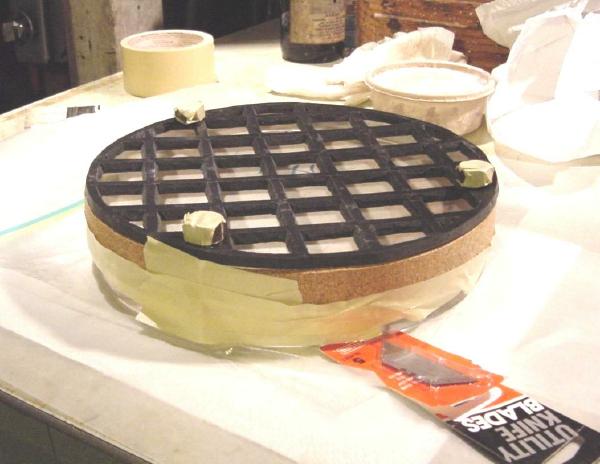
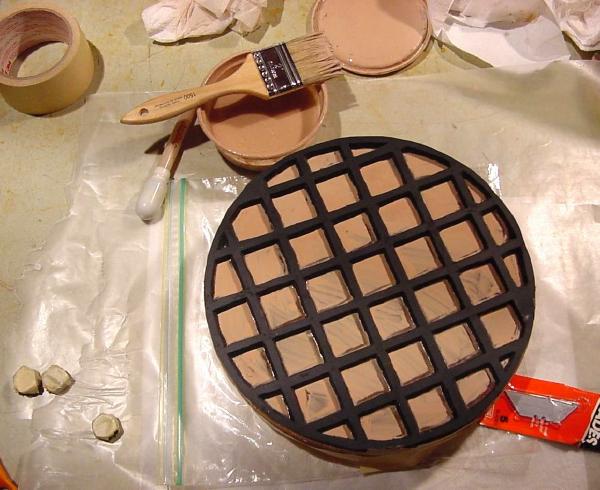
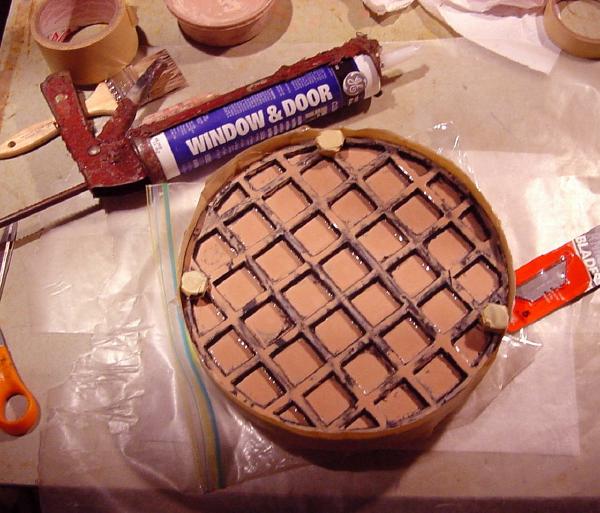
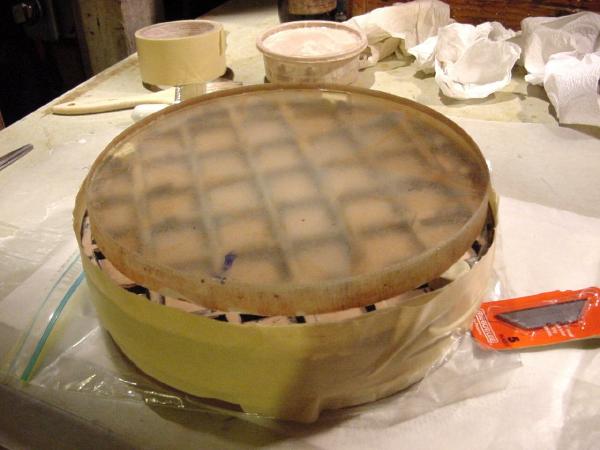
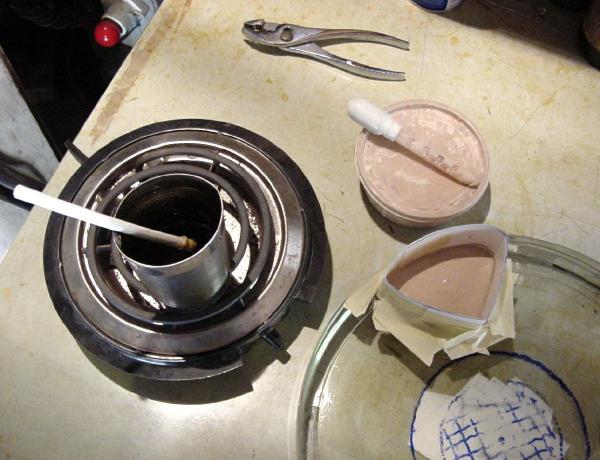
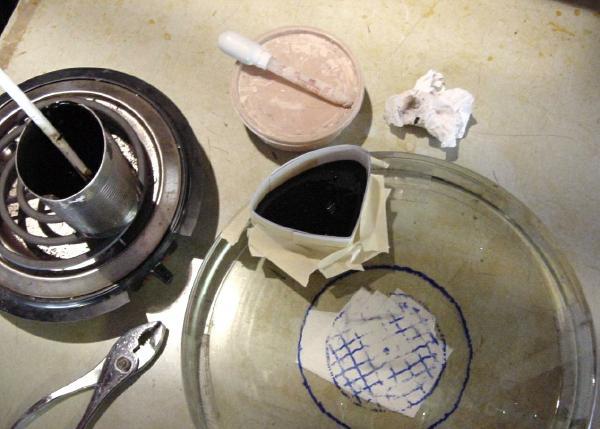
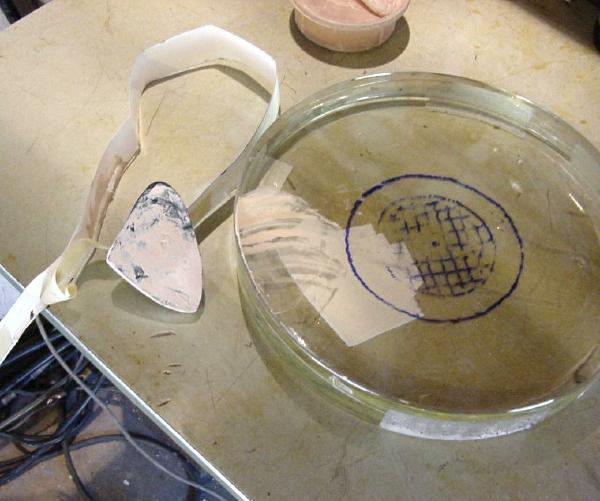
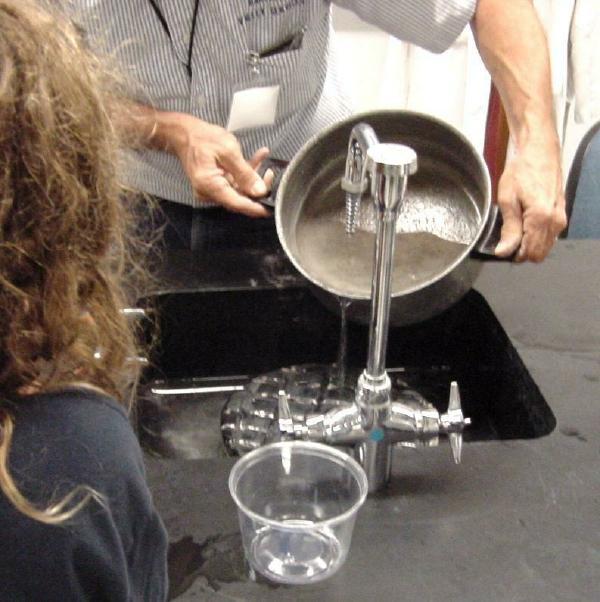
Regarding pitch hardness, pitch that polishes fine at 70 F may leave 'sleeks' on a cool 50 F day.The pitch has low thermal conductivity and requires quite a bit of heat to change from solid to liquid. Here we are watching the pot. Once the last lumps of pitch are melted the temperature will rise quickly so be aware. A dam of masking tape has been made around the old grinding tool. Mark is pouring the pitch. Air currents cause the pitch to cool unevenly so rotate the tool on the table as it cools. Rotating also helps if the table is not perfectly level. Preparing a creamy mix of cerium oxide and water. The tool for pressing the channels appears to once have been part of a lighting fixture. If the water sinks into the pitch then the pitch is still too hot. The night we poured my 12 inch lap it was cold and foggy and we pressed the channels a bit early since the pitch was hardening on the surface. The mirror and the face of the lap almost slid off the tool when we were pressing the mirror. We were able to slip it back to the center with minimal damage. Since the lap will need to be trimmed a bit under size the edge facets are less important. Coating the lap face with CeO is one step you certainly won't want to forget. If you pull the masking tape off slowly the pitch will come with it since the pitch is still fluid. Using quick jerks you can get the masking tape off without pulling the pitch or tearing the tape. Pressing the channels. Sometimes bubbles rise to the surface. The bubbles will stop under the cooler surface of the pitch. If you are careful they can be popped. All goes well when you first start to press the mirror on the lap. If you go too far with pressing the channels will fill up with pitch. The lap facets are like islands floating on liquid pitch. The only way to save your channels is to stop early and allow the lap to cool to the core. Later we can heat the facets with hot water and press again. Chiseling the excess pitch from the pitch lap edge. If you are not quick you might use a little hammer on the chisel. If the lap has cooled enough you can use a hack saw or carpenters hand saw lightly to straighten the channels. If the pitch gums on the saw it can be cleaned later with paint thinner. The straight saw cut down the center of the channel makes a good guide for the utility knife.
With the San Jose Astronomical Society
Pitch is broken up to speed melting.
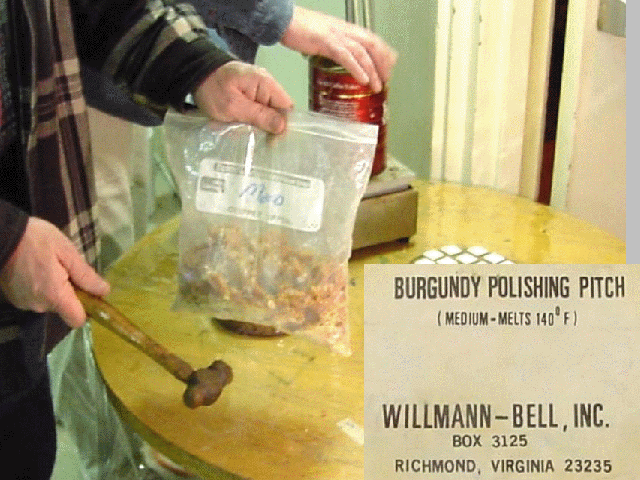
At the SJAA the telescope makers prefer Willmann-Bell's tempered pitch.Melting pitch is a slow process. The pitch has low thermal conductivity and requires lots of heat to melt. Too much temperature and it will burn on the bottom. The pitch can be pre melted at home since it is also slow to cool. Eventually after all the crystalline chunks are melted the temperature will rise rapidly. Stir to check for lumps then turn off the heat to let the pitch cool and thicken. The mirrors are coated with a creamy mix of cerium oxide, CeO, and water. Masking tape is placed around the edge of the tool to keep the pitch from spreading too far. As an option to make the masking tape mold less sticky get a bit of silicon sealant on your finger and wipe lightly around the inside. The vapor from the sealant will make the tape un-sticky. As the pitch cools it becomes a viscous amorphous fluid. If you don't have the tape for the edge then waiting for the pitch to thicken will require patience. Even with the tape be sure the pitch has begun to thicken before pouring. If the pitch is too hot or the room very cold the pitch will harden on top while it is still fluid underneath. Then if you remove the tape too soon the hardened pitch surface will slide off the tool. If the temperature is just right you can press the groves in both directions then flatten the facet tops with the mirror then press the groves again. If not then you may be trimming the pitch lap grooves sooner than expected.
At the SJAA they prefer a steel rod to press the grooves.This plaster of Paris tool was smeared with a mix of paint thinner and pitch some weeks before and the paint thinner has long since departed.
By the time they were ready for my mirror the pitch was solidifying on the bottom and sides of the can. As a result the tape was unnecessary.Here the grooves are pressed with a dowel stick that has been soaked in cool water. This process is most similar to the way pitch laps were made years ago. Mr. Dobson makes pitch laps for an entire class this way. I suspect the pitch is kept on very low heat and stirred often during the process. Then the mirror is pressed on the pitch lap. Don't over do this step. The pitch is still melted near the tool disk and the whole thing can slide off the tool disk or more likely you will press away the groves. If the lap needs to be pressed more wait until the entire pitch lap has cooled then re-heat the faces of the facets under hot water.
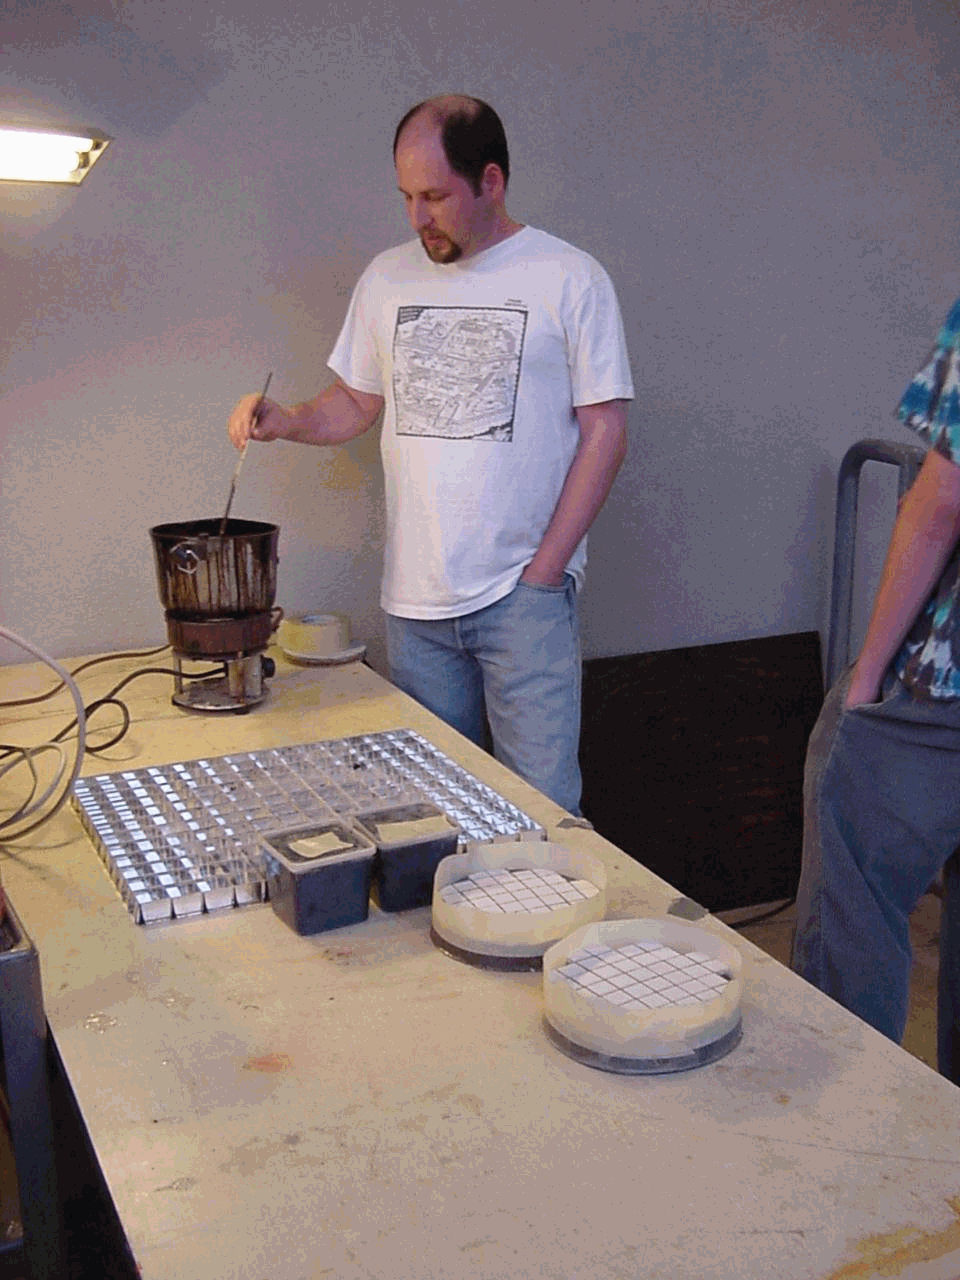
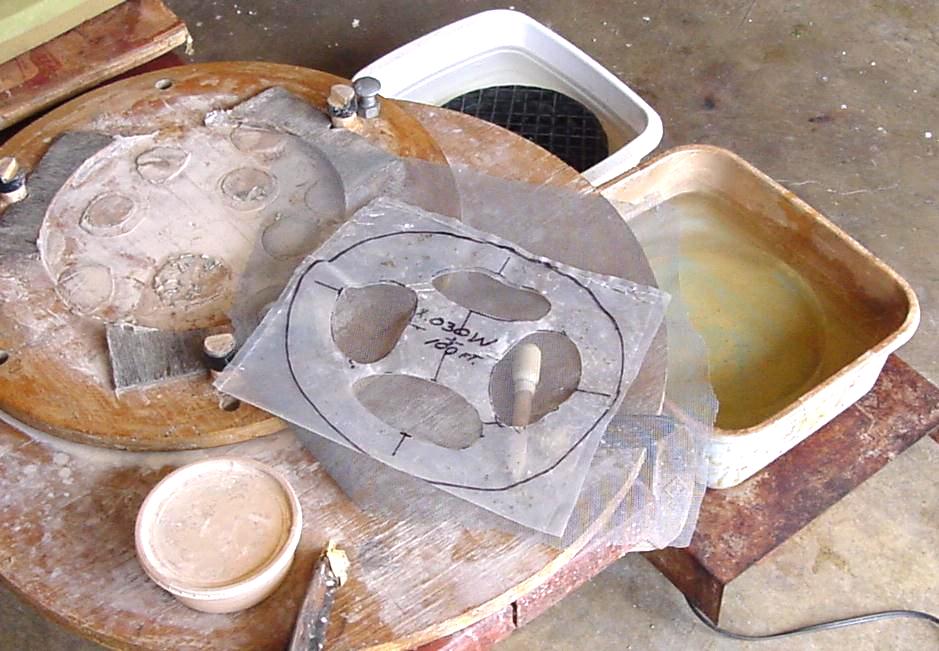
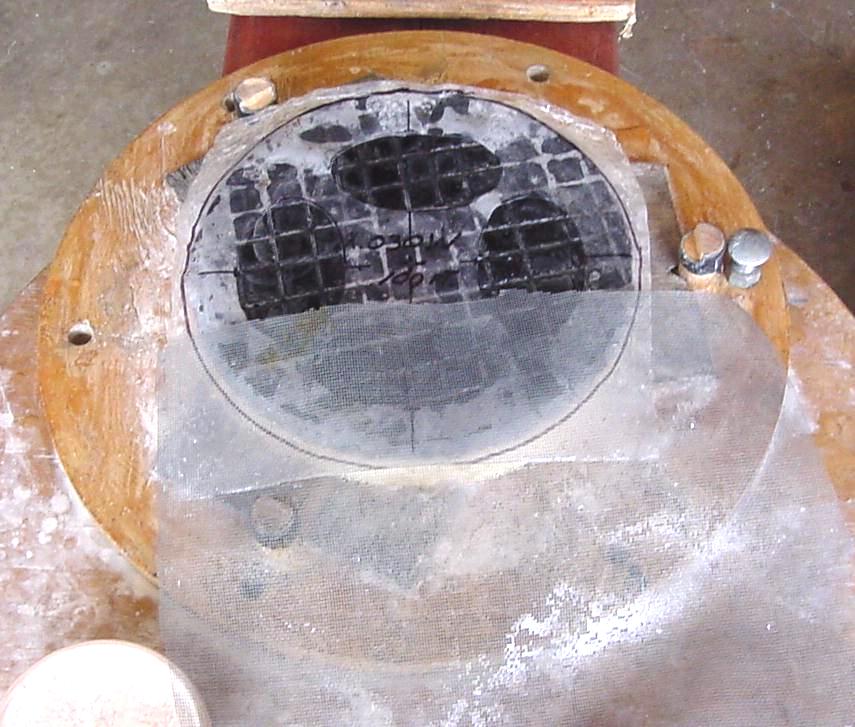
Molding a Pitch Lap, Two Methods
Note that the pitch can be hotter with this method but it is best done on Pyrex
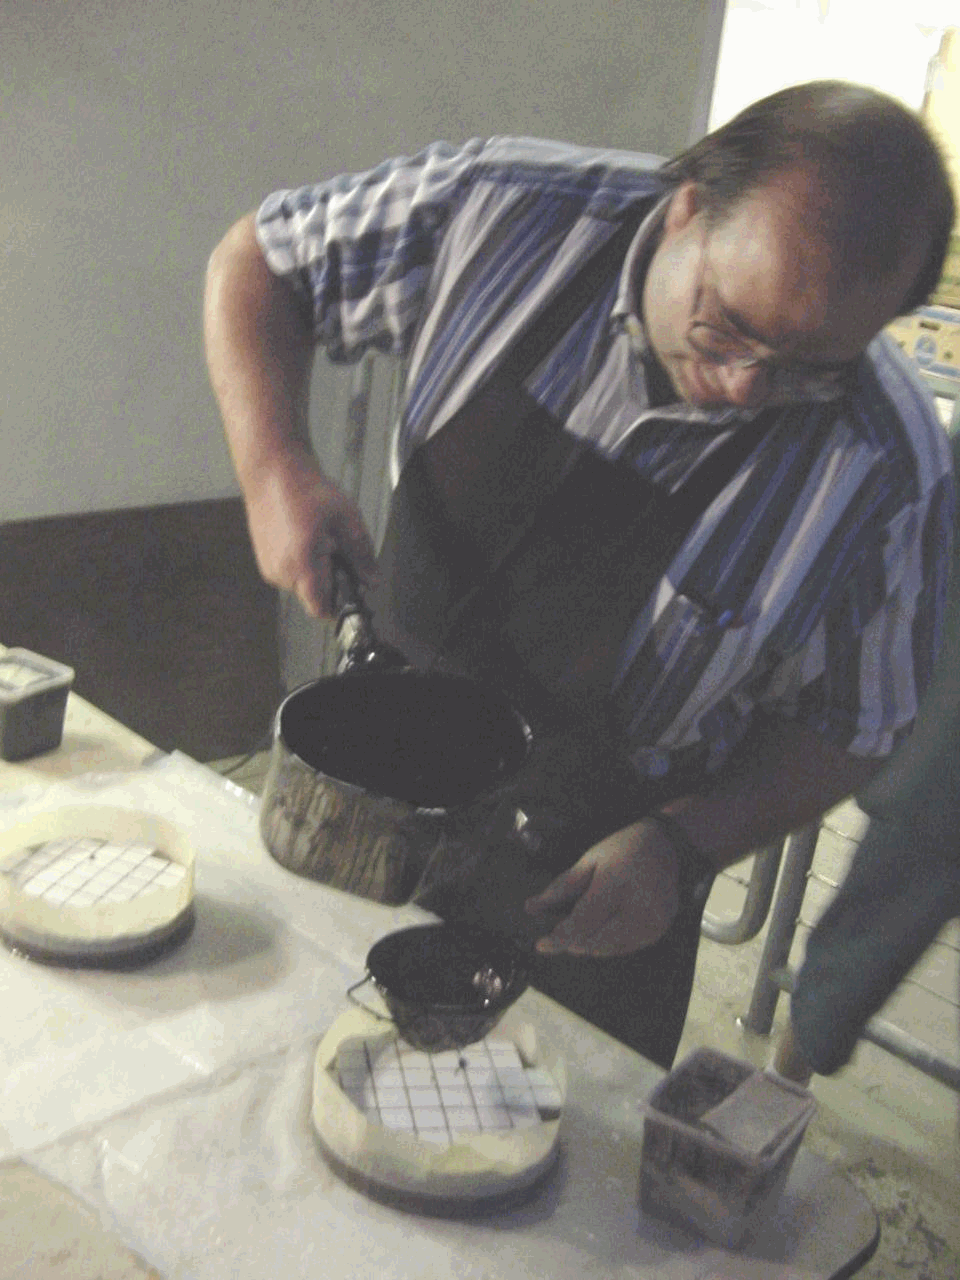
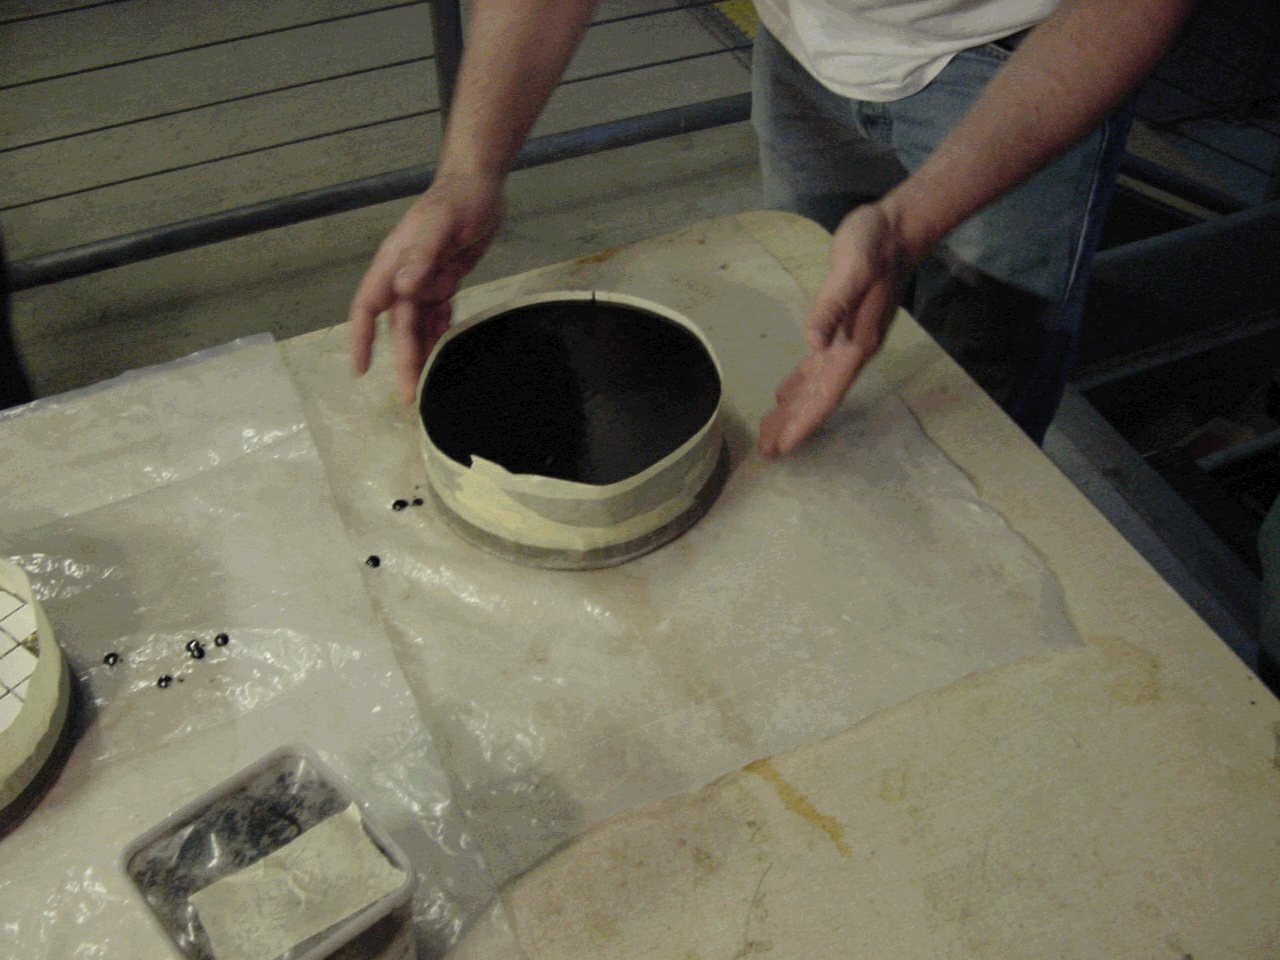
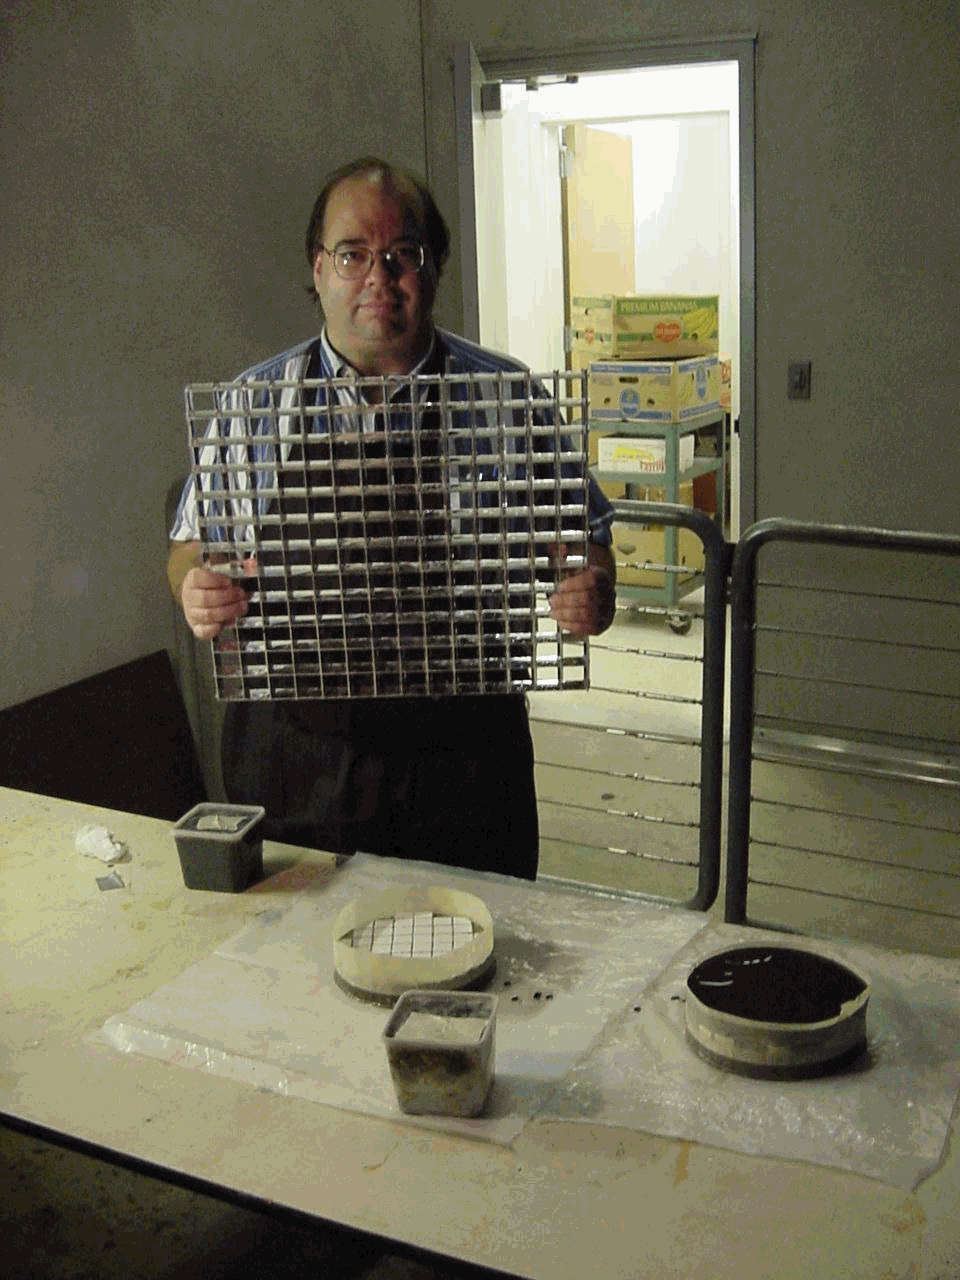
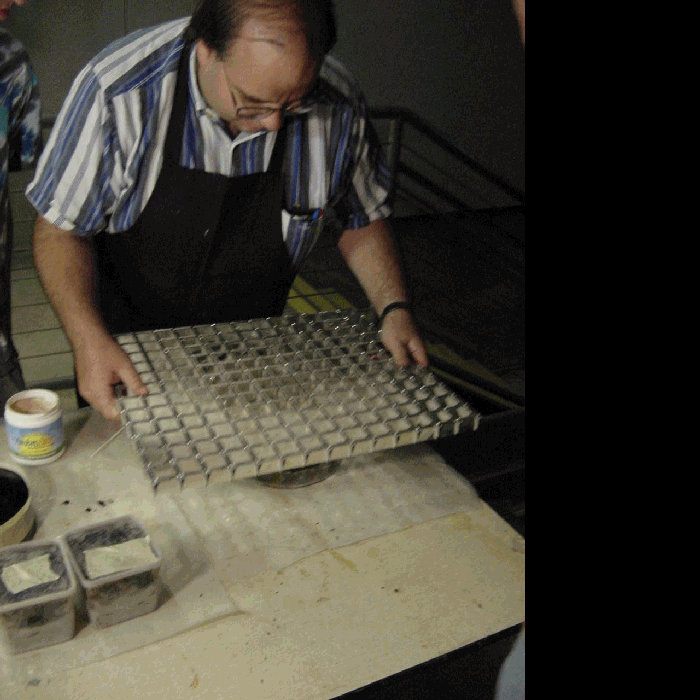
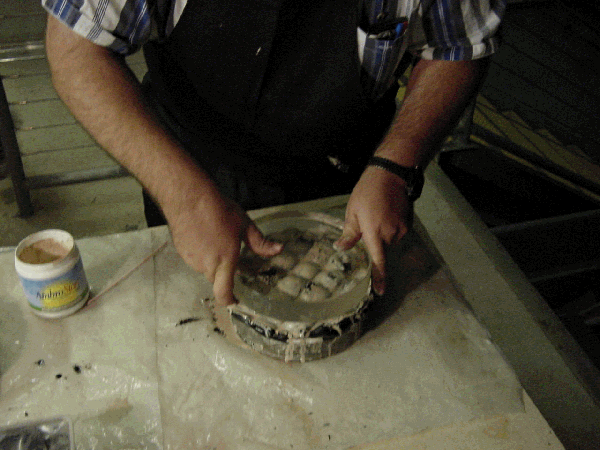
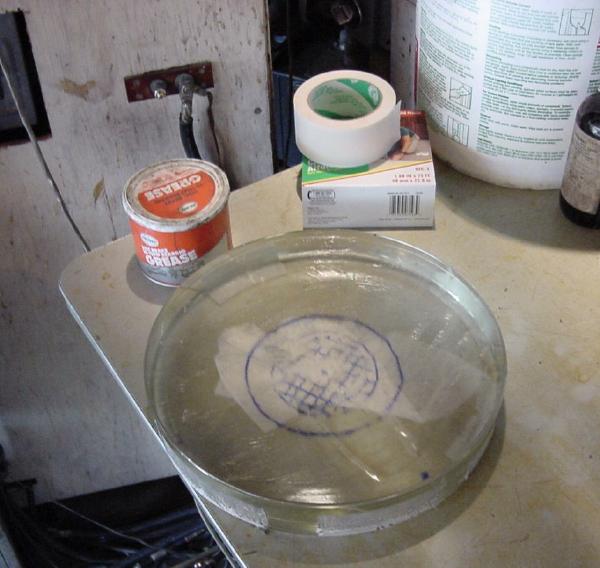
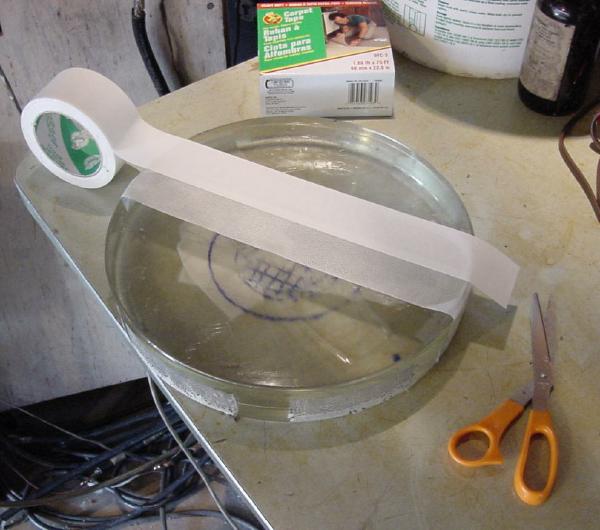
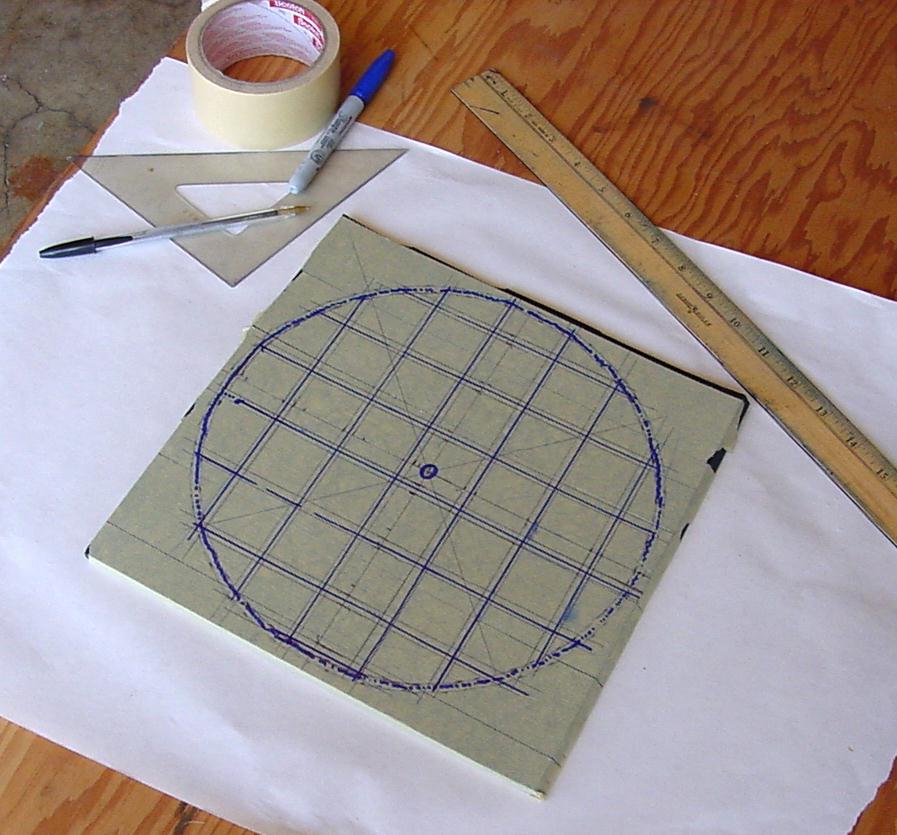
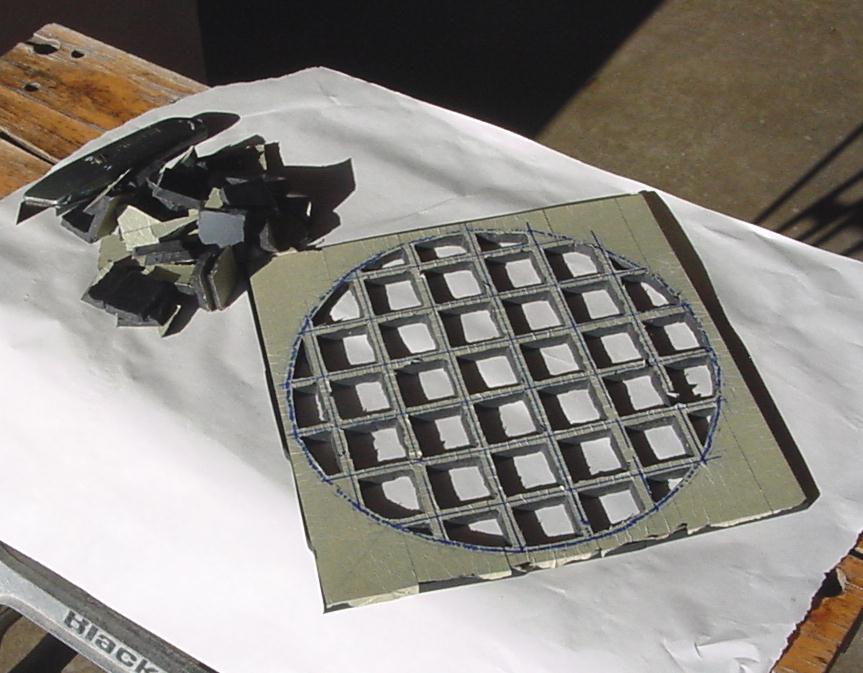
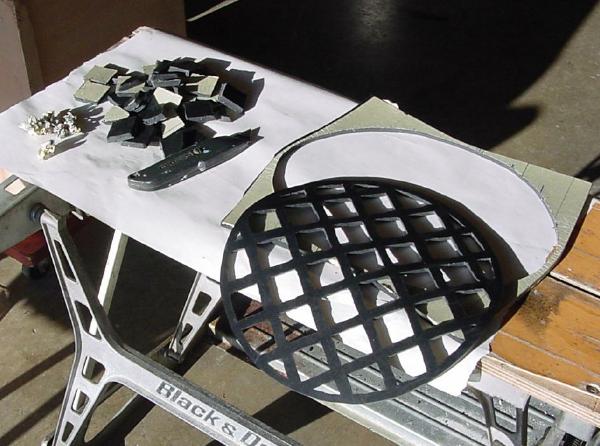
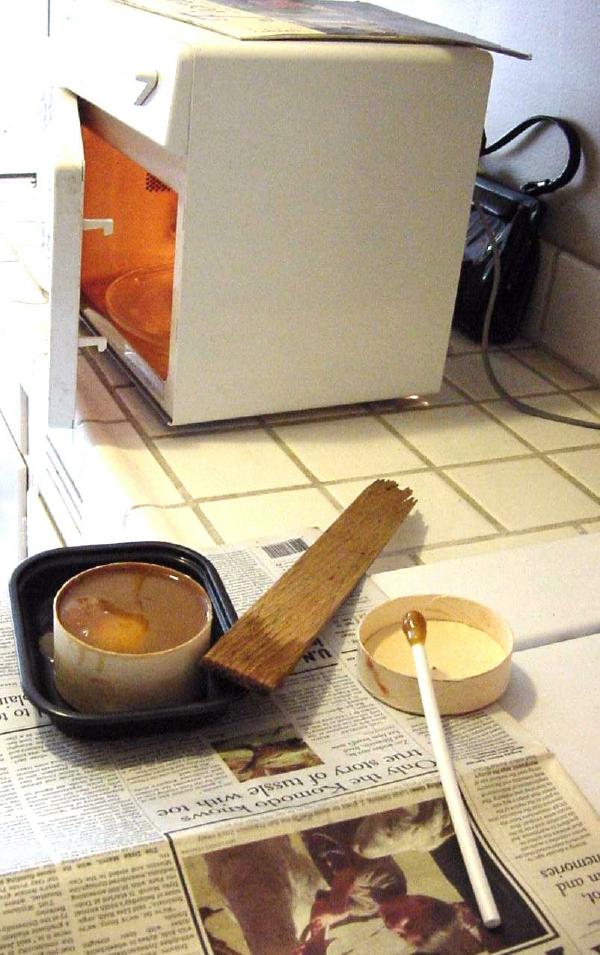
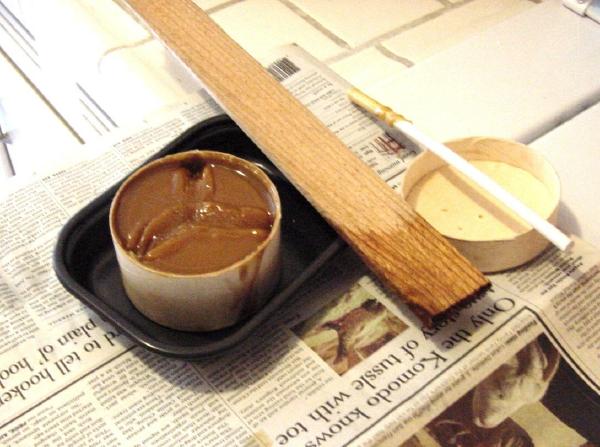
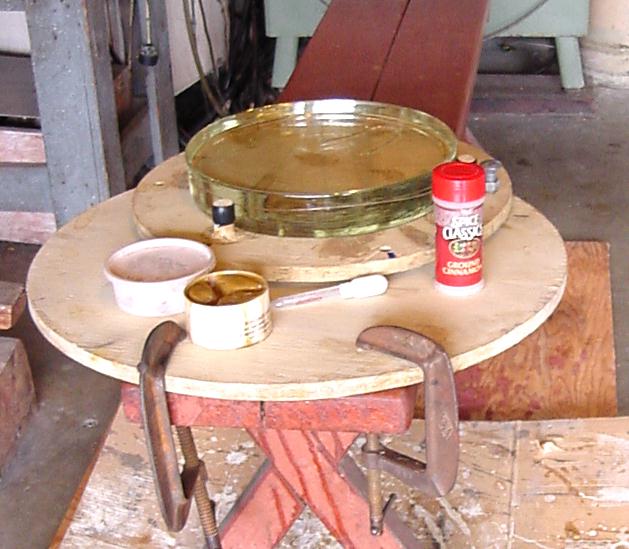
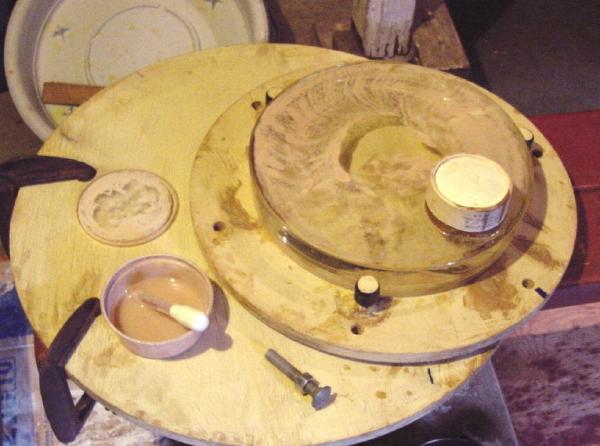
because glass might crack with the heat. See 20s_13in_tool.htmHere is the Plaster of Paris disk we made earlier. We have dissolved some scraps of pitch in paint thinner. The pitch dissolves easily. We dip a paper towel in the mix and smear the face of the disk then let the disk stand overnight for the thinner to evaporate. We smear the face of the mirror with a light coat of automotive grease. As we find later we should have used more grease or better yet strips of aluminum foil on the grease. We cut a strip of double sided rug tape with the scissors and put across the mirror center. If the tape is too wide it will not lay flat on the curved surface. If the scissors get gummy they can be cleaned with paint thinner. We try not to get any air under the rug tape by sticking it to the mirror center first and working out to the edge.. Even though it is not sticking to the grease it can't come up if air can't get under it. The mirror sides were not greased and the end of the tape sticks tightly to the mirror edge. We carefully remove the tape backing from the double sided tape after laying each strip. We bought some scrapes of low voltage lighting cable from Orchard Supply. The cable is coated with a bit of light oil and you must clean the wire with paint thinner so it will stick better to the rug tape. First we mark the center of the mirror with a marker pen. The center of the mirror will be offset in one corner of the center pitch lap facet. By offsetting the center of the pitch lap you are less likely to get 'zones' when polishing. The wires are spaced 1 1/2 inch apart. The wire can be shaped to the mirror curve before sticking to the rug tape. We cut 7/8 inch pieces of wire on a paper cutter to go between the long wires. Try to keep these lines straight so we can clean them out later with a saw. OK, we are ready for the sides of the mold. Note the center facet is offset from the mirror center. Since it is late we will put the Plaster of Paris disk on the wires over night. The next morning we put some tape around the mirror edge to make the mirror bigger. Then we form the mold with 2 inch masking tape. The diameter is still too small to allow the Plaster of Paris disk to slip in so we slit the tape top and put a masking tape band aid on it to make it bigger. When we test the disk it sticks to the top of the masking tape. We get a little silicon sealant on the end of our finger and run it around the mold top. This will make the masking tape un sticky. We masked the disk for a cleaner job and test it in the mold. It fits nicely. We use three 1/2 inch nuts as spacers. Since we will be pressing the lap and cleaning the channels we need extra thickness. We should have wrapped the nuts in masking tape for easier removal later. We heated the pitch until the lump melted. It takes a while. Once the lumps are melted it warms rapidly and gets runny. We don't want to pour it in too hot so we let it cool until it begins to thicken. Since they always use a strainer at Chabot I did the same. I was able to get the strainer clean by soaking it in paint thinner later. Something about the pitch reminds me of the La Brea Tar Pits. We poured in the pitch until it was level with the top of the nuts. It was deeper on one side so we shimmed the mirror until it was level then lowered in the disk. After cooling a bit no problem removing the masking tape from the yet warm assembly. We try to remove the nuts from the pitch with a screw driver and they tighten up right away. Its bad news to have something hard pressing against the edge of our glass even with the rug tape between. We go off for 5 minutes to think about it and when we get back we find the nuts are no longer tight. Since the mirror was beveled we have to trim the pitch out from the bevel and we expect the mirror to slip off easily. Apparently the heat of the pitch has caused the rug tape adhesive to melt into the automotive grease making something not too slippery. We try to slip the lap off the mirror with a force of about 50 pounds for a total of about 10 minutes and find it has slipped one millimeter. After another 10 minutes its free. Removing the wire is not too hard. We start at one end and run the utility knife on each side of the wire as we pull. We scrape the remaining adhesive from the facet tops. At Chabot I was told that the pitch lap should be made of one pitch all the way through and not be coated with anything. After cleaning with paint thinner the mirror is warmed in a pan of hot tap water. We coat the mirror with CeO water mix, don't forget to do this! We have heated a pan of water on the stove until it is almost boiling. We pour the very hot water over the cool pitch lap face then right away do a heavy press. OK, its pressed into contact as you might expect but some of the groves have partly filled. We clean the groves with the saw and utility knife. The saw works best at its base where it is yet sharp. If the lap is too hot the pitch will gum on the saw. If the lap is too cold the pitch will chip every time you touch it with the saw. Use just the weight of the saw or less, no more. It doesn't take long. Measure the fine ground or polished face of your mirror and make sure the edge of the lap is trimmed at least 1/4 inch inside that diameter. Then taper the facets at the edge of the lap. After washing all the pitch dust from the mirror we do a light press before polishing.
Experimenting with Forming Pitch Lap Grooves
Making a Weegee Lap, Large and Small
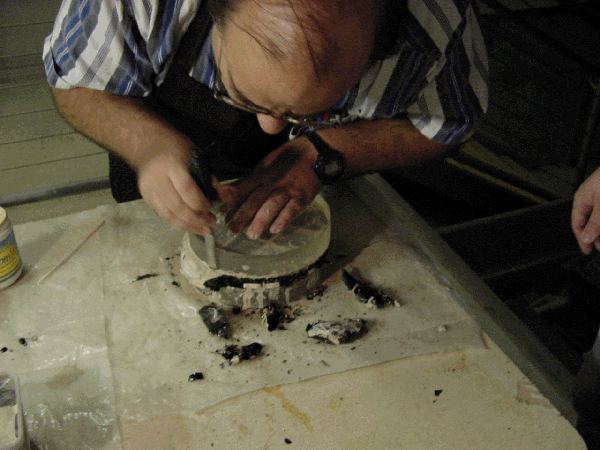


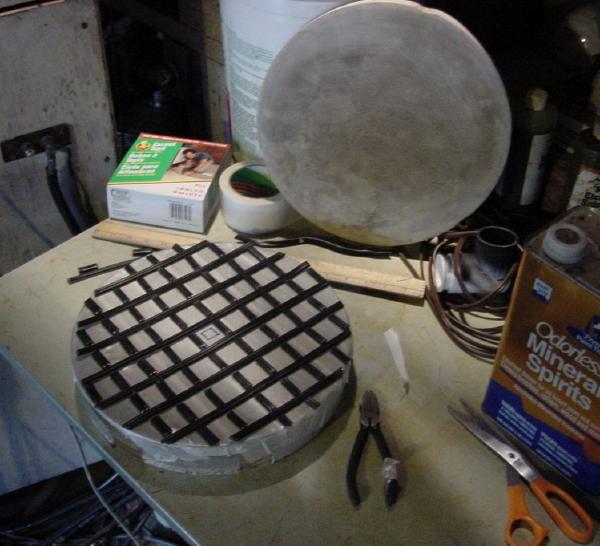


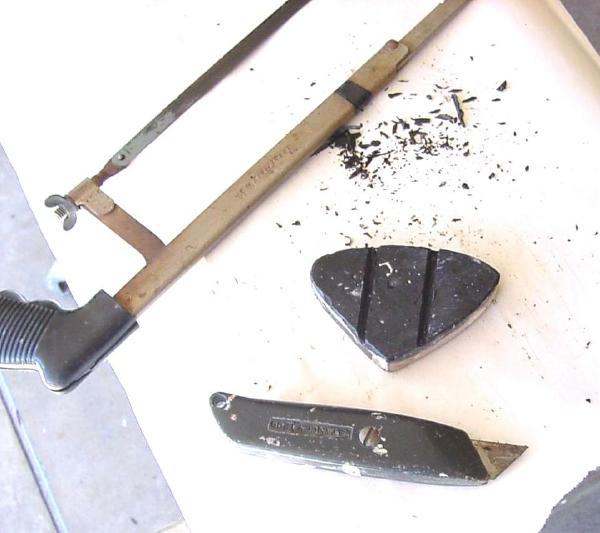
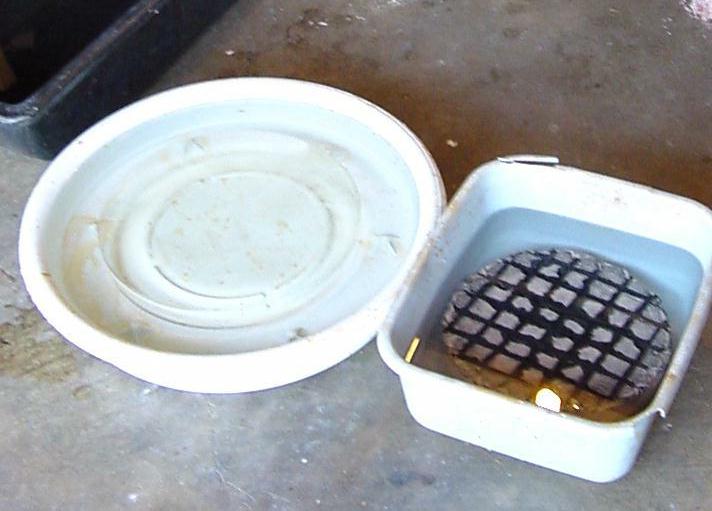
Trimming and Re-grooving the Pitch Lap
 |
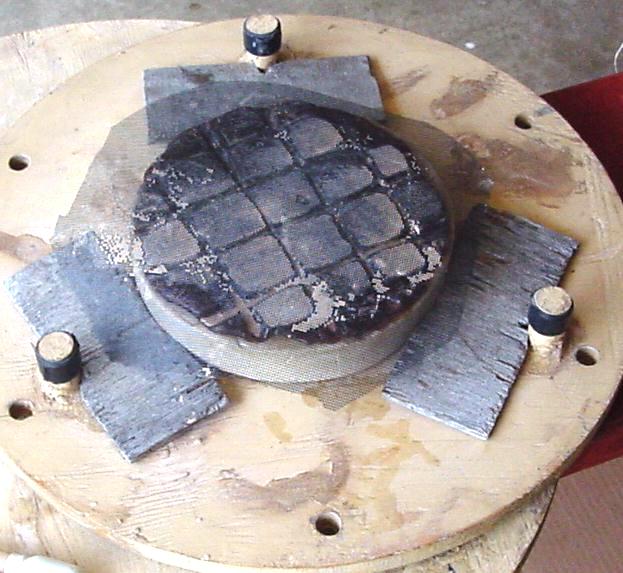
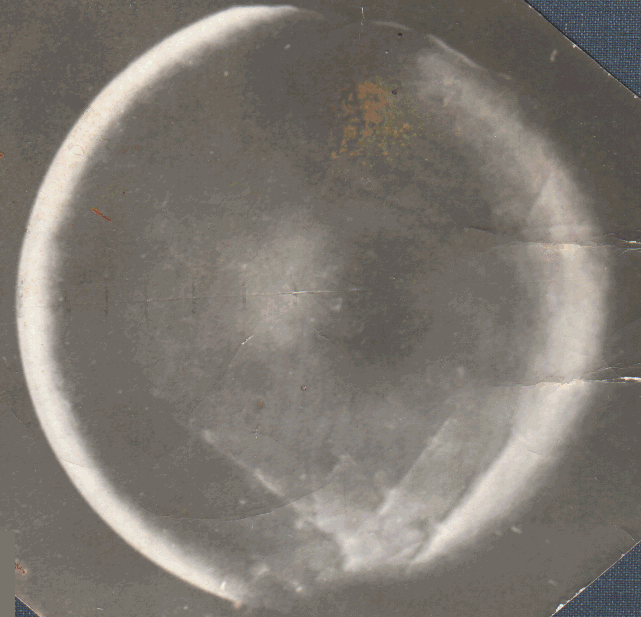
My friends at the telescope makers workshop tell me that when the pitch lap grooves are this small they need to be enlarged. |
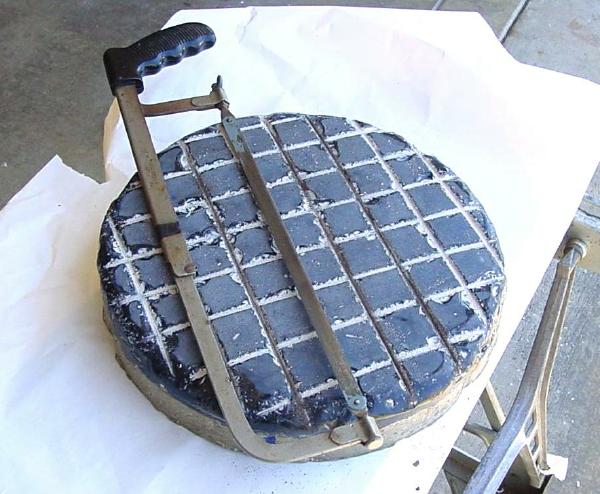 |
Chipping is not too bad with a hack saw. The lap needs to be warmed in water that is about 110 F. Then cooled enough so that the pitch will not gum on the saw. Use light pressure. Smearing the lap with liquid dish detergent will help to keep the pitch from gumming on the saw. If you cool the lap in the refrigerator and use a carpenters saw the lap will chip badly. After using the saw with the dish detergent make sure all the suds are completely washed away otherwise the detergent will begin to breakdown the pitch. |
 |
We use the saw cut as a guide for the blade tip when widening the grooves. Not a big project. When done wash all the pitch dust and detergent away before doing a press. |
 |
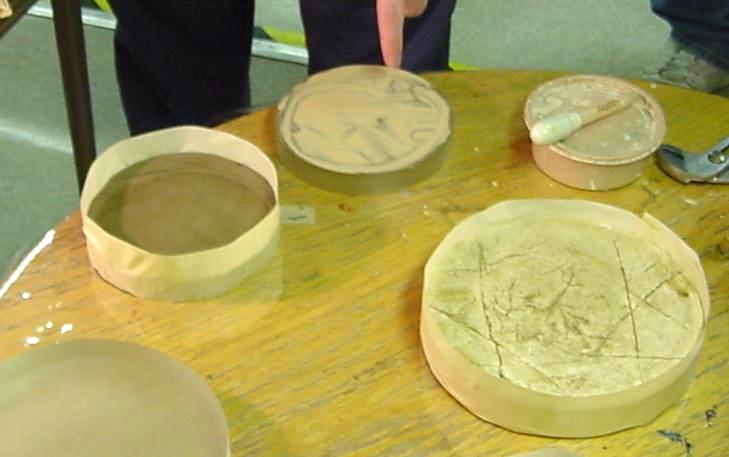
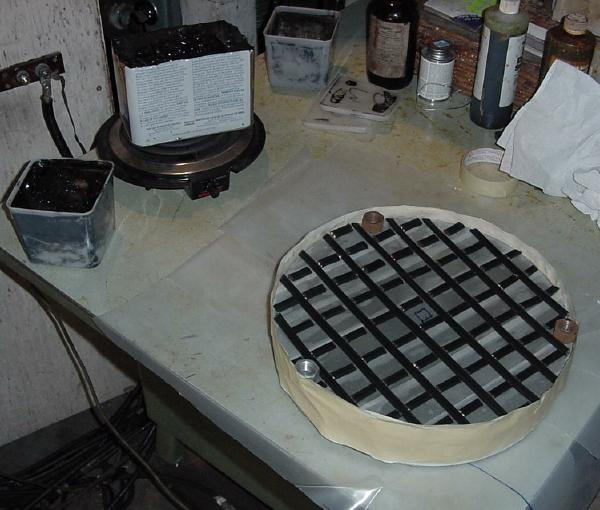
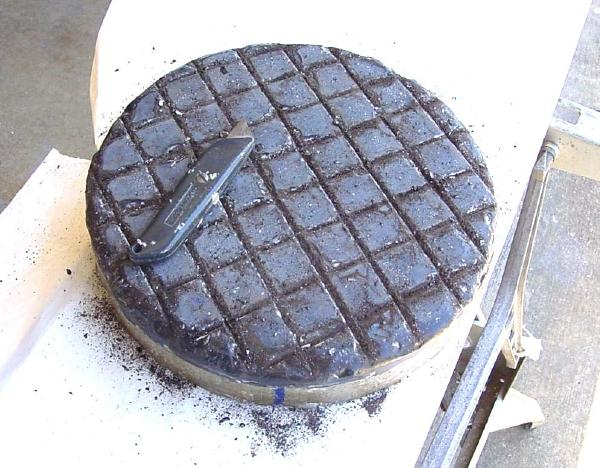
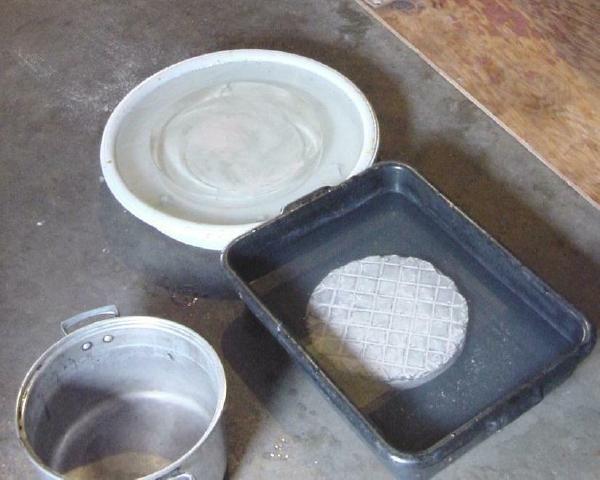
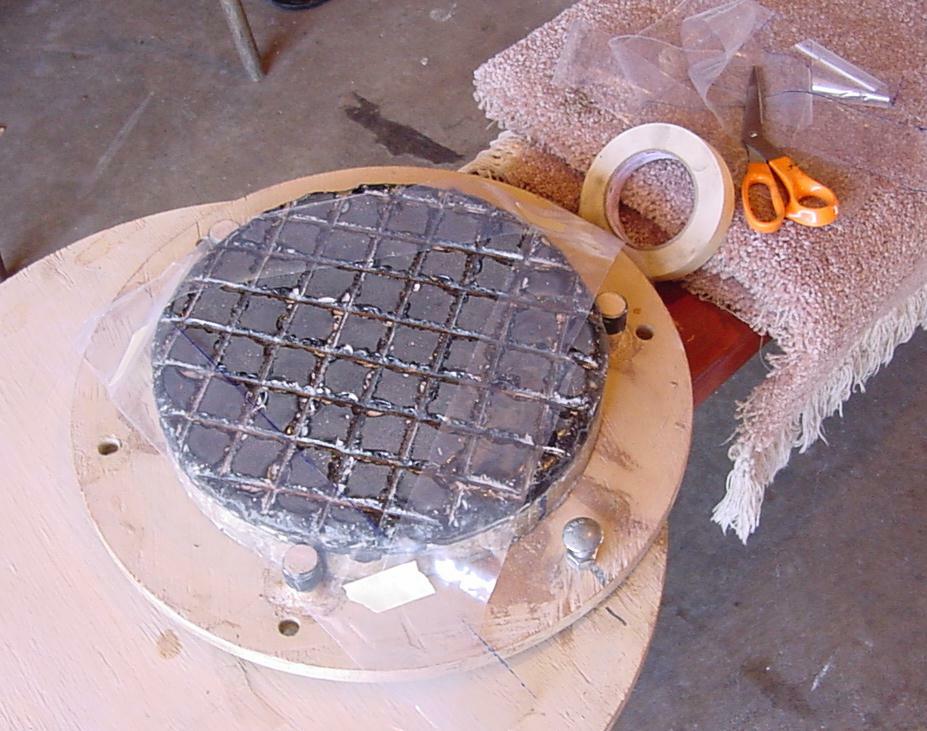
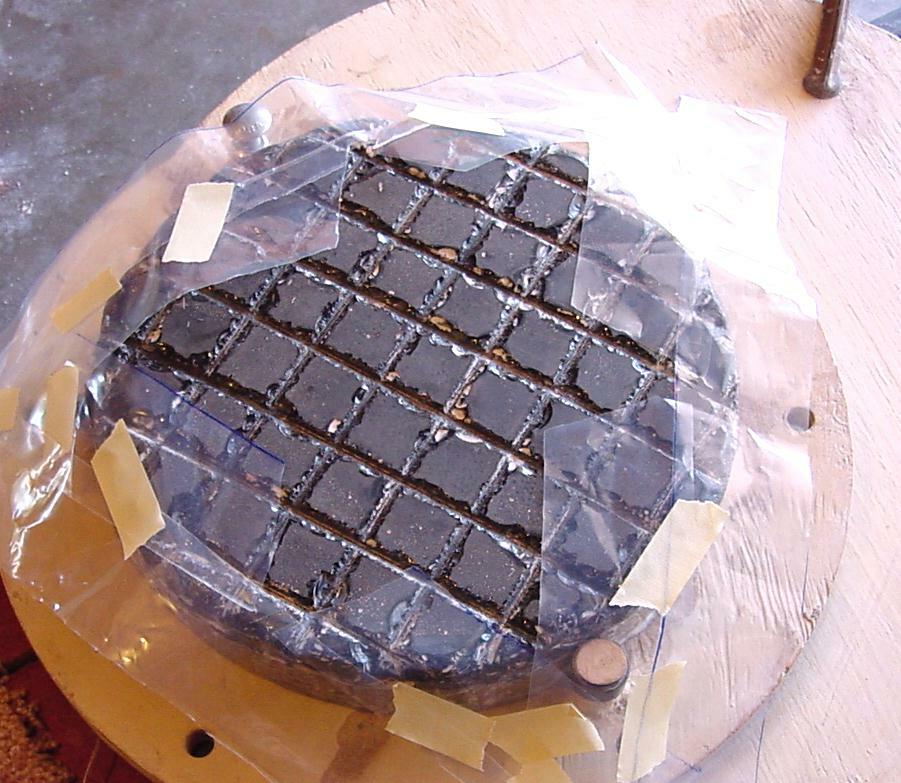
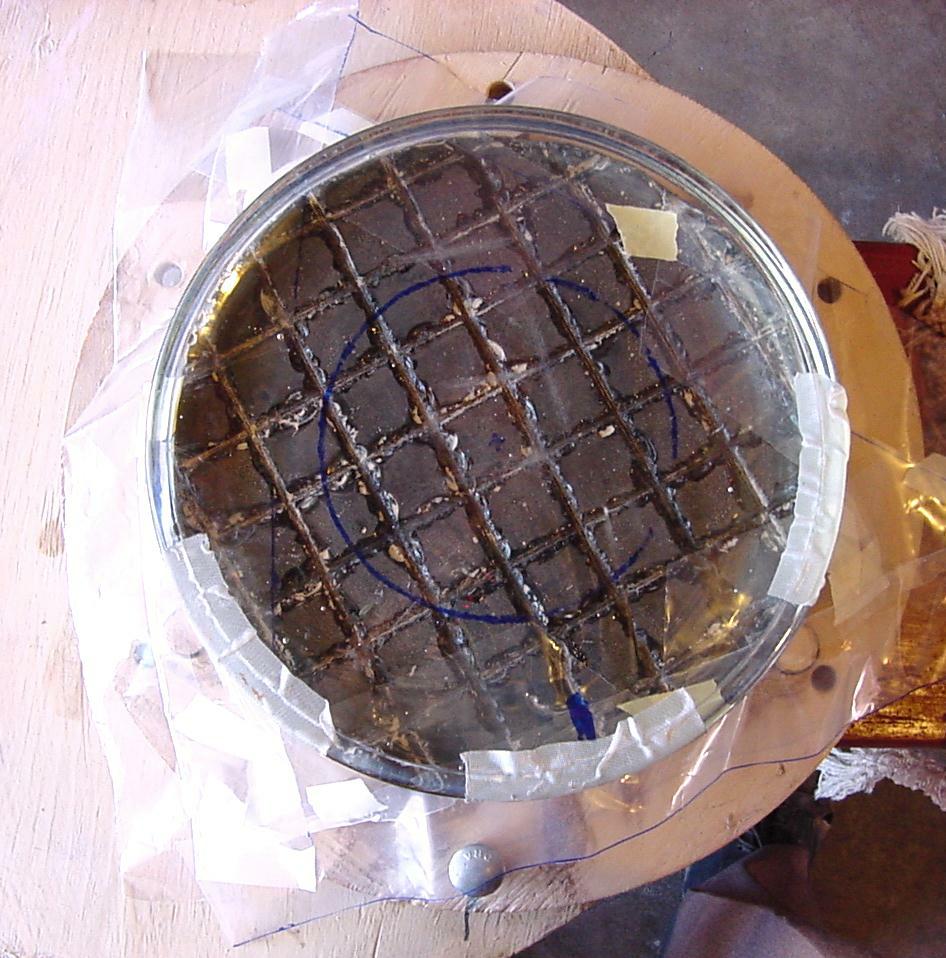
This used 10 inch lap has been pressed to a mirror of longer focal length. Pressing closed the center grooves. In this picture we have just re trimmed the grooves. |
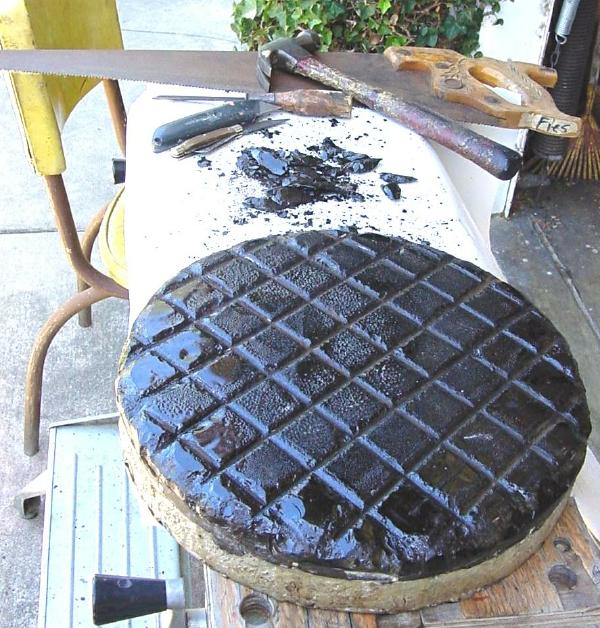 |
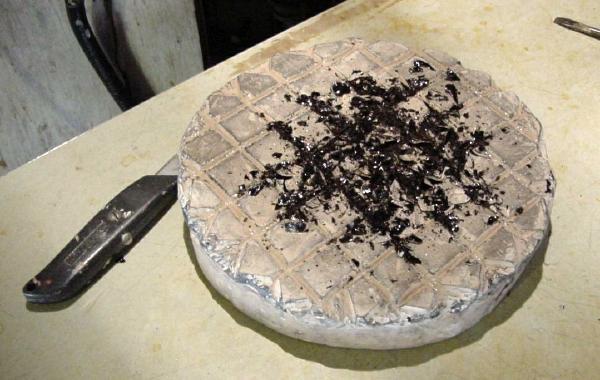
This new lap needs some work. When it was made the face slipped a bit off the concrete backing and there were cracks in the pitch. We slowly heated the pitch with a propane torch outside on some bricks until the cracks melted together. Next we measured the diameter of the fine ground face of the mirror and trimmed the lap 1/4 inch under size. Then we tapered the facets near the edge as done on the 10 inch lap above. Then we did the heavy duty press then trimmed as above. After washing we pressed again to flatten any remaining pitch chips. |
| Pouring a pitch lap on a plaster of Paris disk that has not completely dried can produce a lot of bubbles that rise to the surface of the pitch but do not burst. The bubbles beneath the surface of the pitch can be burst with a propane torch if used carefully. Pitch has a low vapor pressure but if it ever really gets on fire it is quite incendiary. | |
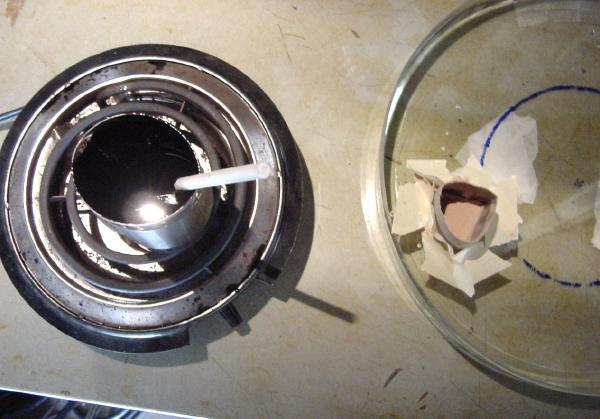
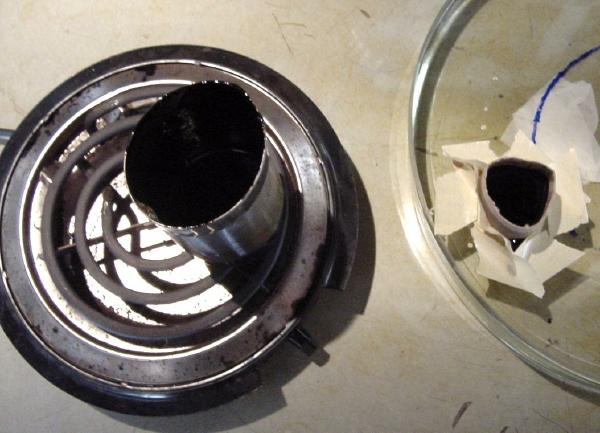
Pressing the Pitch Lap
Don't Bother
Do we press every time before polishing? No not necessarily, while 'polishing out' the fine grinding you can store the mirror on the lap to keep it in shape. Or you can just start polishing. The mirror will grab because there are high spots on the lap and if you just push it through you may remove 1/10 wave at one spot. Before finishing the 'polishing out' you will be removing maybe 3 or 4 wavelengths of glass so 1/10 wave in one spot at this stage is unimportant. Keep in mind that if there happened to be a grinding grit stuck to the pitch you may wish you had pressed the grit into the pitch before polishing.
Often when the mirror grabs if you just stop for 10 seconds the high spot in the pitch will settle. Polishing generates heat and the point that grabs is heated the most. Storing the mirror on the pitch lap for years is not recommended. I stored my mirror on the pitch lap dry for five years and it required 8 hours of polishing to remove the pattern of the pitch lap.Light Press
Medium Press
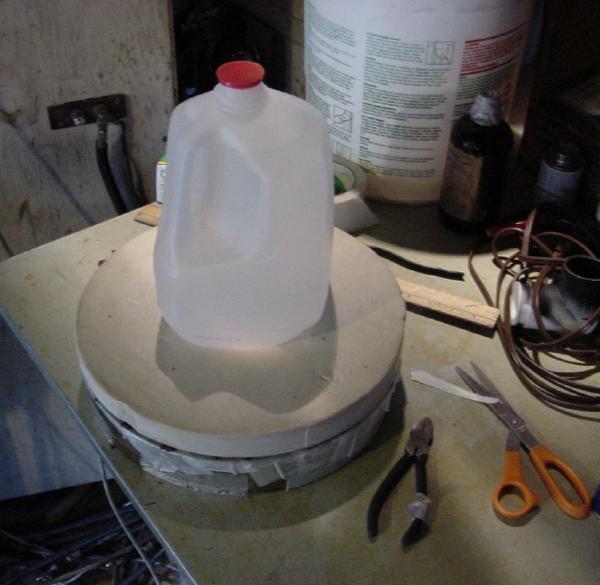
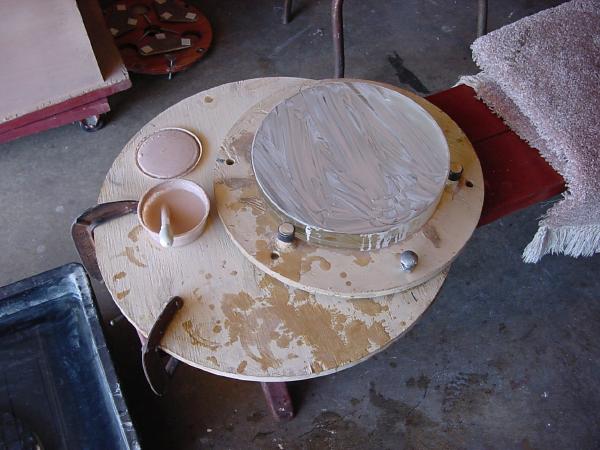
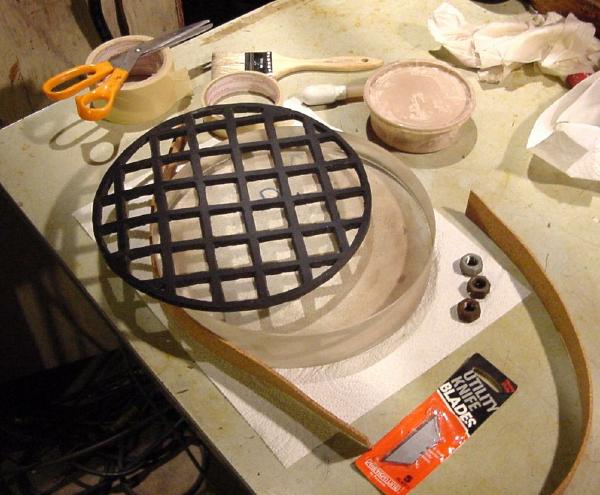
After trimming the pitch lap channels we might want to press the lap a bit harder. Here we warm the mirror and an under size lap in very warm tap water. Add the CeO water mix and press with a bit more pounds per square inch of pressure.
We do this press on a lap that is really out of shape. Either a new lap or a lap that was used previously on a mirror of different focal length. We warm the mirror in very warm tap water and while the mirror is warming we heat water on the stove until it is almost boiling. Pour the almost boiling water over the lap, add the CeO water mix and press with your body weight. After a heavy press the pitch lap channels will need to be re grooved.

Pressing with a Screen, Texturing
On a new lap there might be too much friction so you can press the mirror on the lap with a plastic window screen between. You won't need to warm the lap as much for texturing as for the heavy press. If there is too much heat and you press for more than 1 or 2 minutes the screen may stick to the pitch. The ripples in the face of the lap facets can more than double polishing speed. Heavy polishing with lots of pressure will remove lots of glass. Well, lots of quarter waves anyway.

Under Size Laps for Parabolizing and Pressing with Polyethylene
 |
Polyethylene won't stick to the pitch and this is quite useful. We pressed with these two squares of polyethylene then polished to remove a high zone in the 80 percent area. It worked fine. The problem with this is that to return the lap to normal operation required a heavy press. |
 |
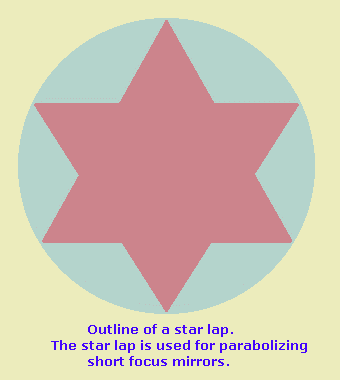
Here we use polyethylene to make a star lap. The star lap is used for parabolizing short focus mirrors. The star lap is used with pressure at the center to avoid a turned edge. We once used a rose lap to parabolize our mirror but we suspect the star lap would be better at smoothing the mirror than the rose lap. |
 |
One possible polishing stroke with the star lap uses a wide variable length 'W' with the angle at the base of the star points just reaching the edge of the mirror. For more on the star lap and how to use it refer to alt_14.htm |
 |
|
Using Vinyl Seat Cover Material to Press an Optical Flat Polishing Lap
| When grinding with the mirror on the bottom
the mirror becomes more convex. It took me some time to realize that
this is not true when polishing with the pitch lap on top. Polishing
speed depends on pressure but also friction and friction is set by the
temperature of the pitch. The pitch in the lap center becomes warmer
than the pitch at the edge because pitch at the edge can lose heat by
water evaporation and exposure to the room air. So if you start polishing an optical flat with the lap on top and large overhang the edge of the flat will turn down and the center will become deeper. The result is a high zone in the 80 percent zone. The effect is hard to see when polishing a telescope mirror because the deepening center goes unnoticed. The deepening center is then used as the new reference and the edge seems to be even more turned down. |
|
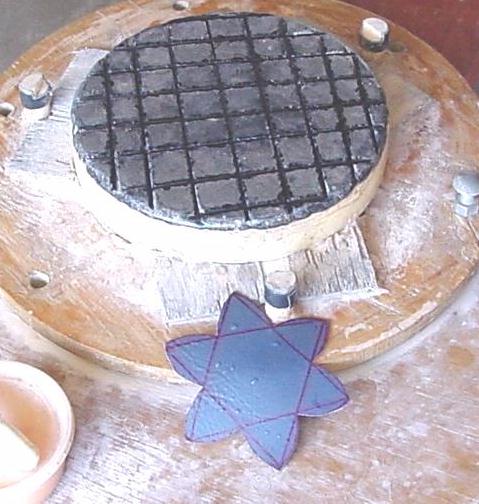 |
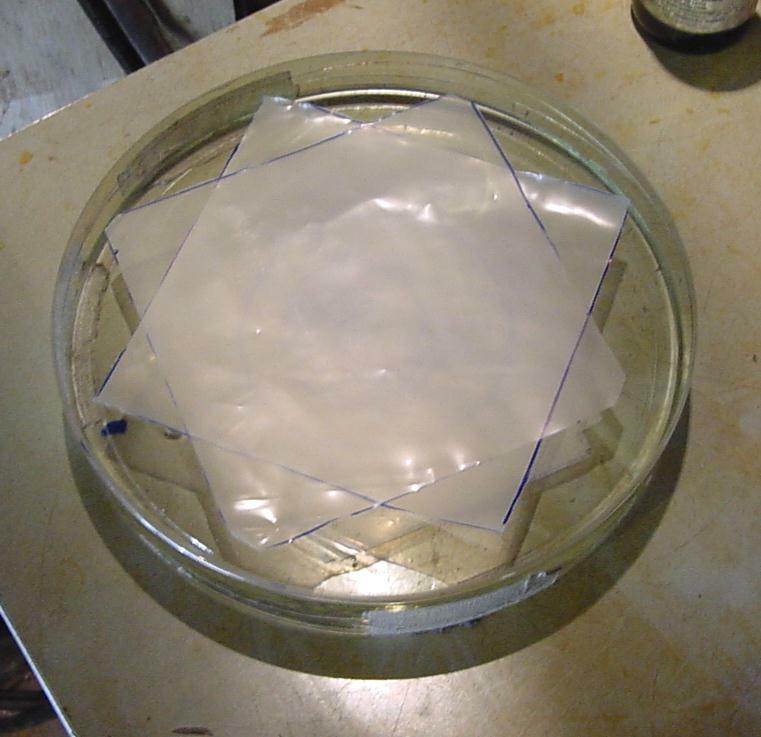
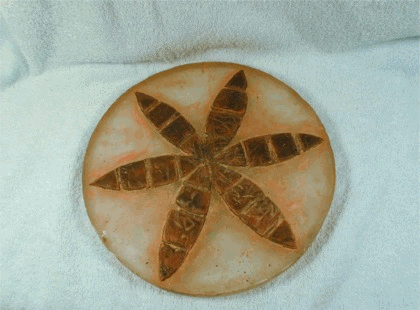
The objective here is to make a lap to make the flat more convex without making zones and without making the center deeper. A small scrap of vinyl seat cover was obtained from an auto seat cover shop. The six point star was laid out with a compass. The points of the star were made convex, see alt_14. |
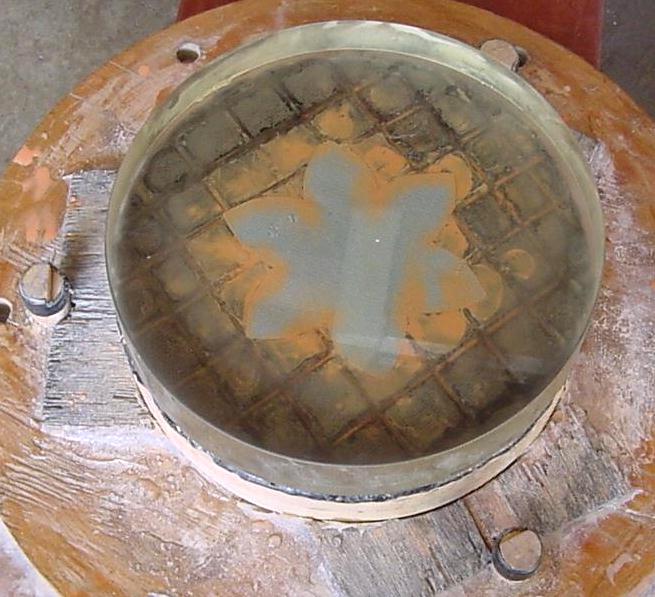 |
We heated the lap in warm water then poured lots of almost boiling
water over it and pressed with the vinyl surface of the star against the
lap using a heavy press. |
Using both Polyethylene and Window Screen for an Optical Flat Polishing Lap
 |
The objective in this case is to make a pitch
lap that smoothly removes a high zone. In this case at near the 70 percent
zone. The polyethylene is nearest the pitch lap and the plastic screen nearest the flat glass. The depth of the embossed areas are increased because the polyethylene bridges the holes in the screen except where the textured areas are to be. About two minutes of heavy pressure were required with the mirror and lap warmed as for a medium press. If the first press was not enough then align the polyethylene with the original press and press more. |
 |
|
| This type of lap is not normally required
when making a telescope mirror. In the case of a telescope mirror
the
oblating stroke would be used. The flat had been very concave and the edge was brought down to the elevation of the center by using very long strokes with a normal lap that had not been embossed. The lap shown was effective in bringing down the 70 percent zone using a smoothing "W" stroke. |
|
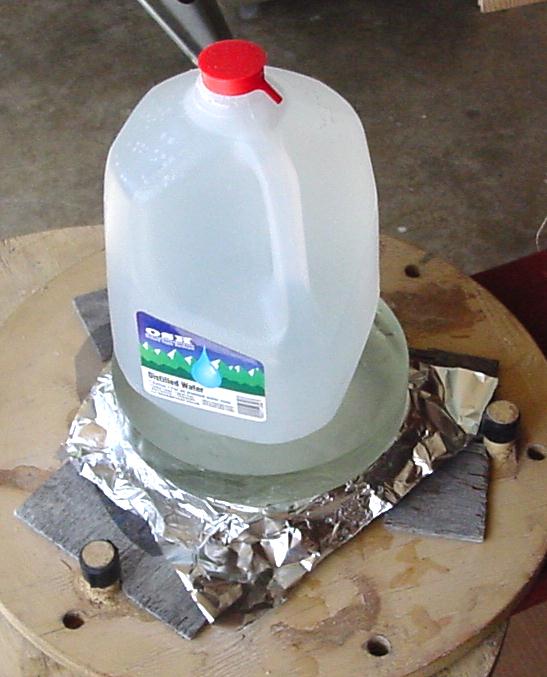
Transporting a Pitch Lap
If you need to transport the pitch lap in a hot car put the lap in a polyethylene bag and cool it in the refrigerator. In the car put the lap in blankets or heavy coats.